Is that??? Why yes… Yes it is…
- Is that??? Why yes… Yes it is…

And it only took 23 years to finally get it built!
I wish I had pictures of my first attempt, started so long ago. Alas, I do not.
It sat, unfinished, on my 10 acre dirt farm in Marana, AZ for so long, it became known to neighbors as “Woodhenge”; and not affectionately, I must say.
This manifestation, in all its bucket list checking glory, began life on 9 January 2021, just 5 months before I sit here writing this post.

When I built the swimming pool way back in 2005, which is on the right, behind the tree, I fully intended to keep on going and get the observatory done. That didn’t happen… But better late (16 years late) than never, right?
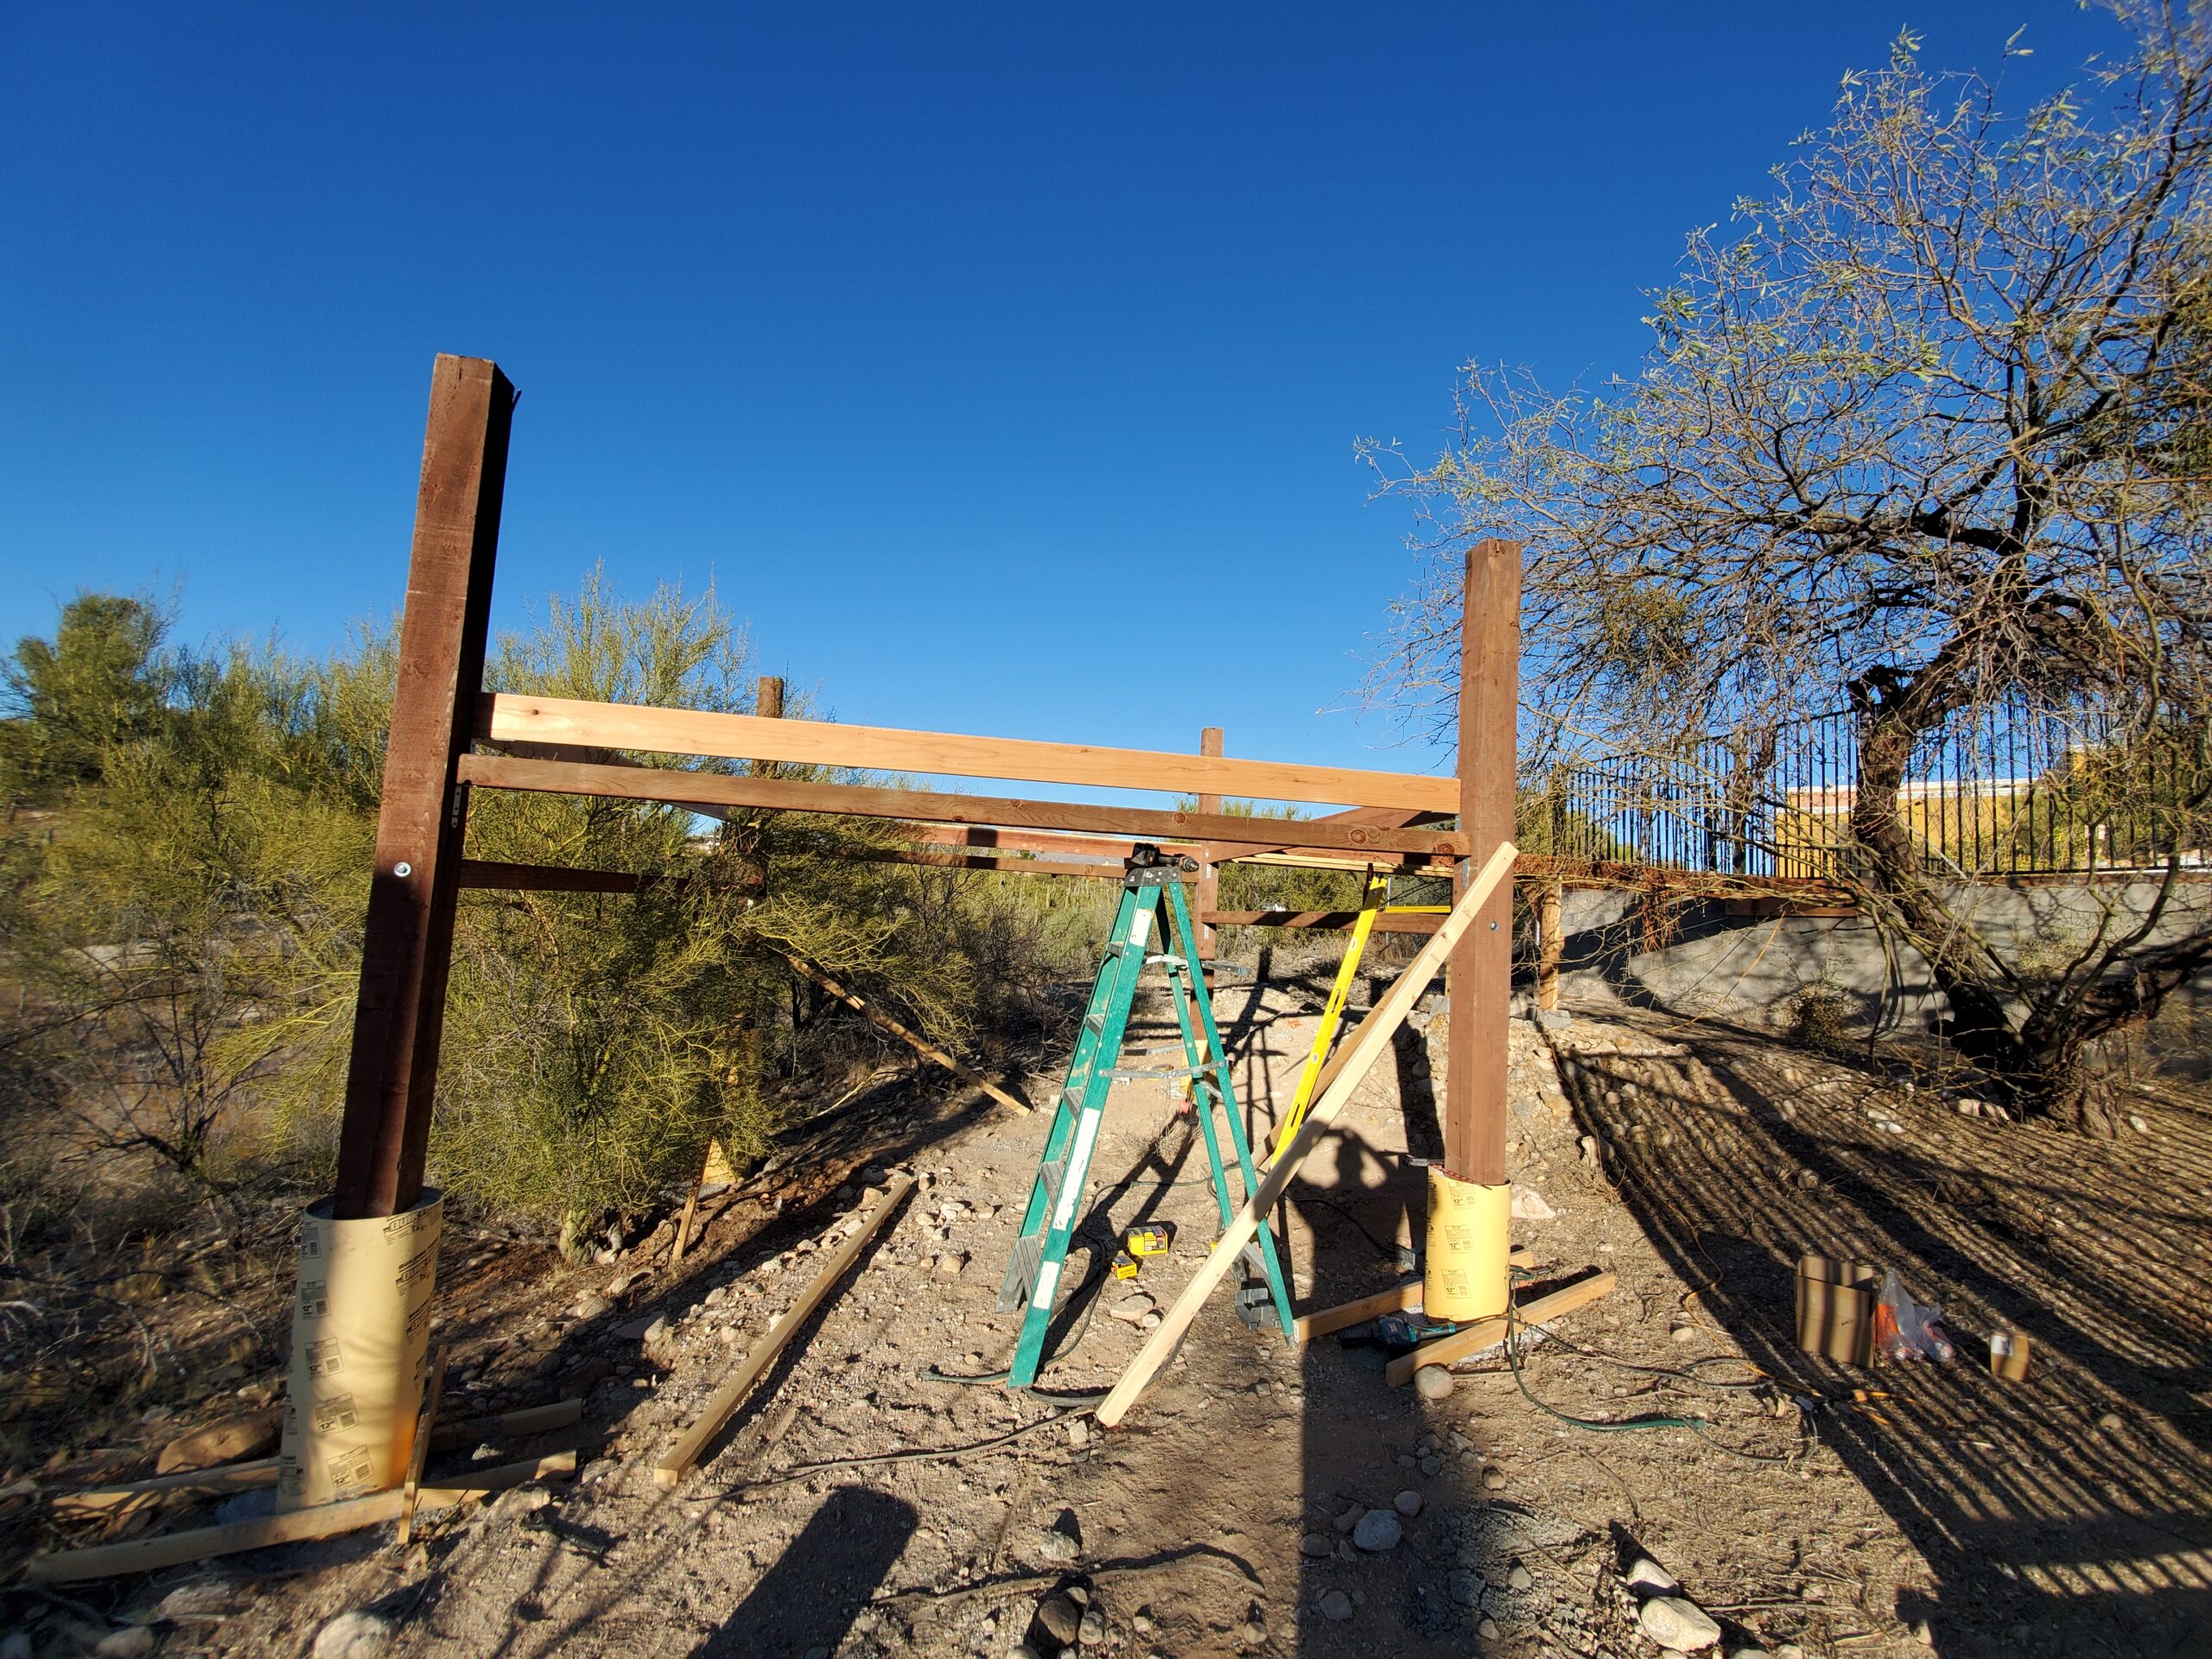
In the picture above, I have two of the eventual 4 6×6 posts set on the concrete footers that my son and I dug and poured a couple of days earlier. You can also see the framing for the bridge from the pool area to the observatory platform. Believe it or not, I actually set the gate posts for that bridge in 2005 when I was doing the pool. So to anyone who says I leave projects unfinished, I suggest you simply need to adjust the time scale at which you sample for doneness.
All the posts are up… The posts are actually vertical, my holding of the phone was not…

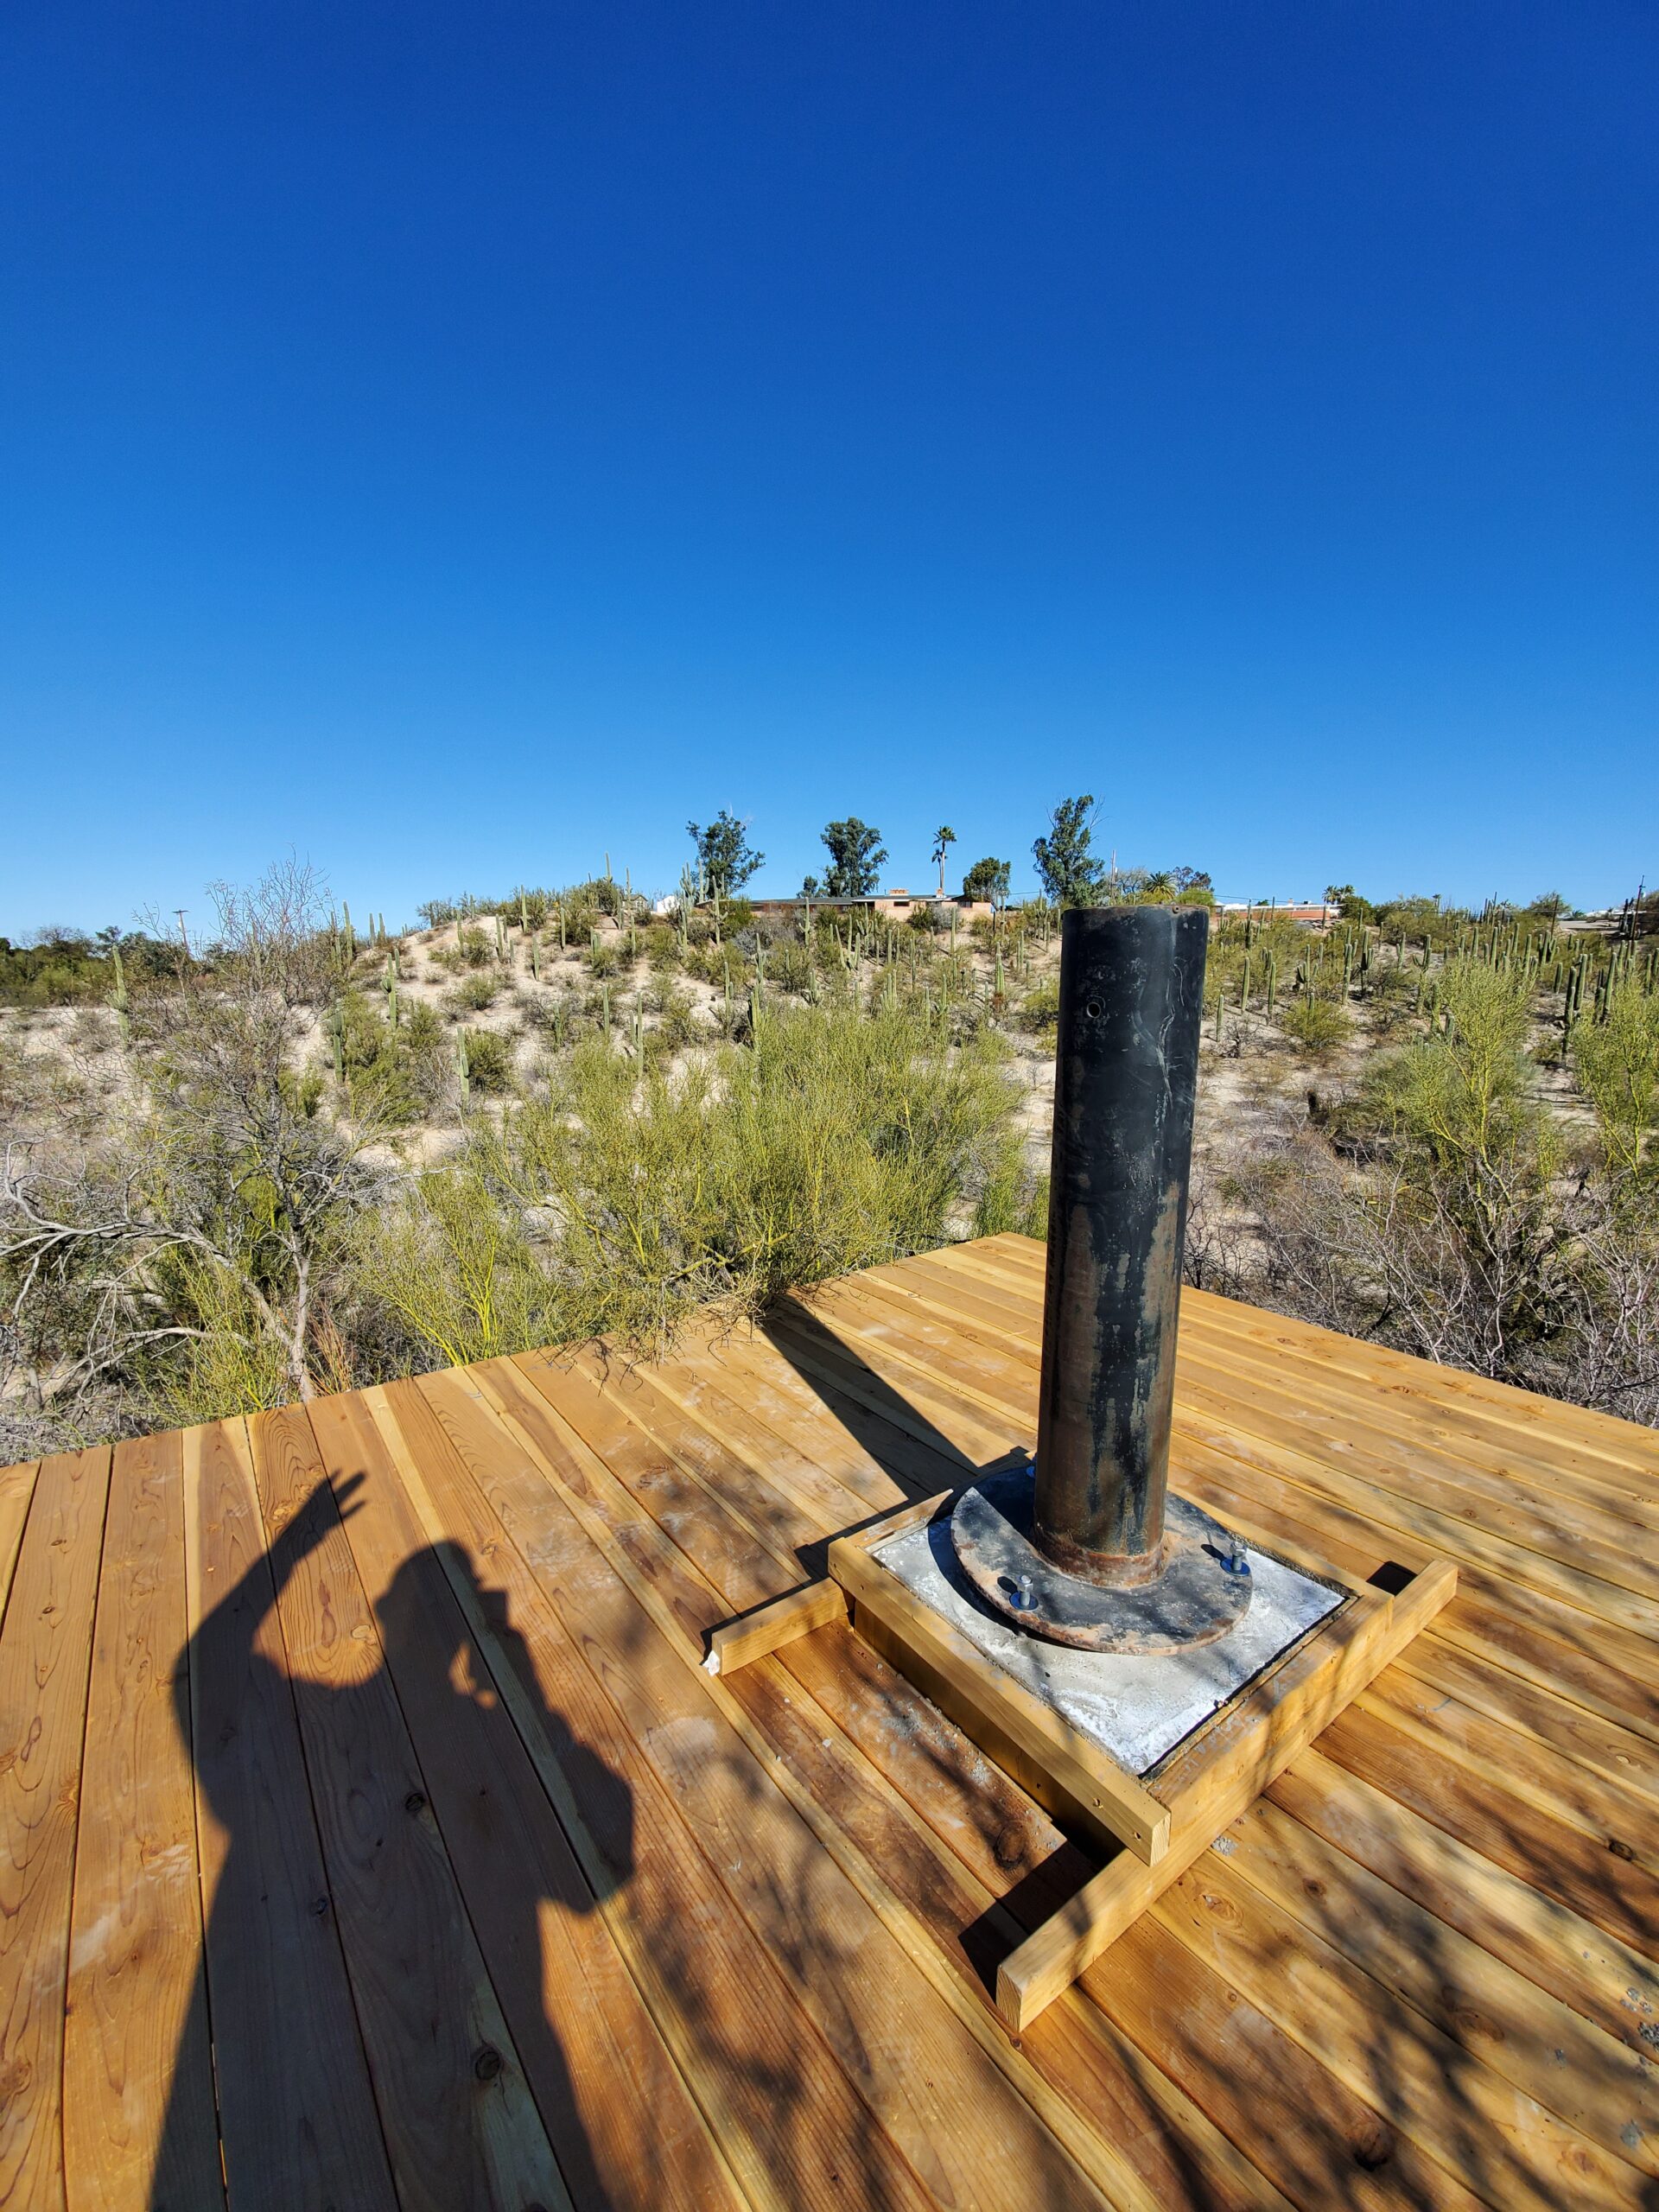
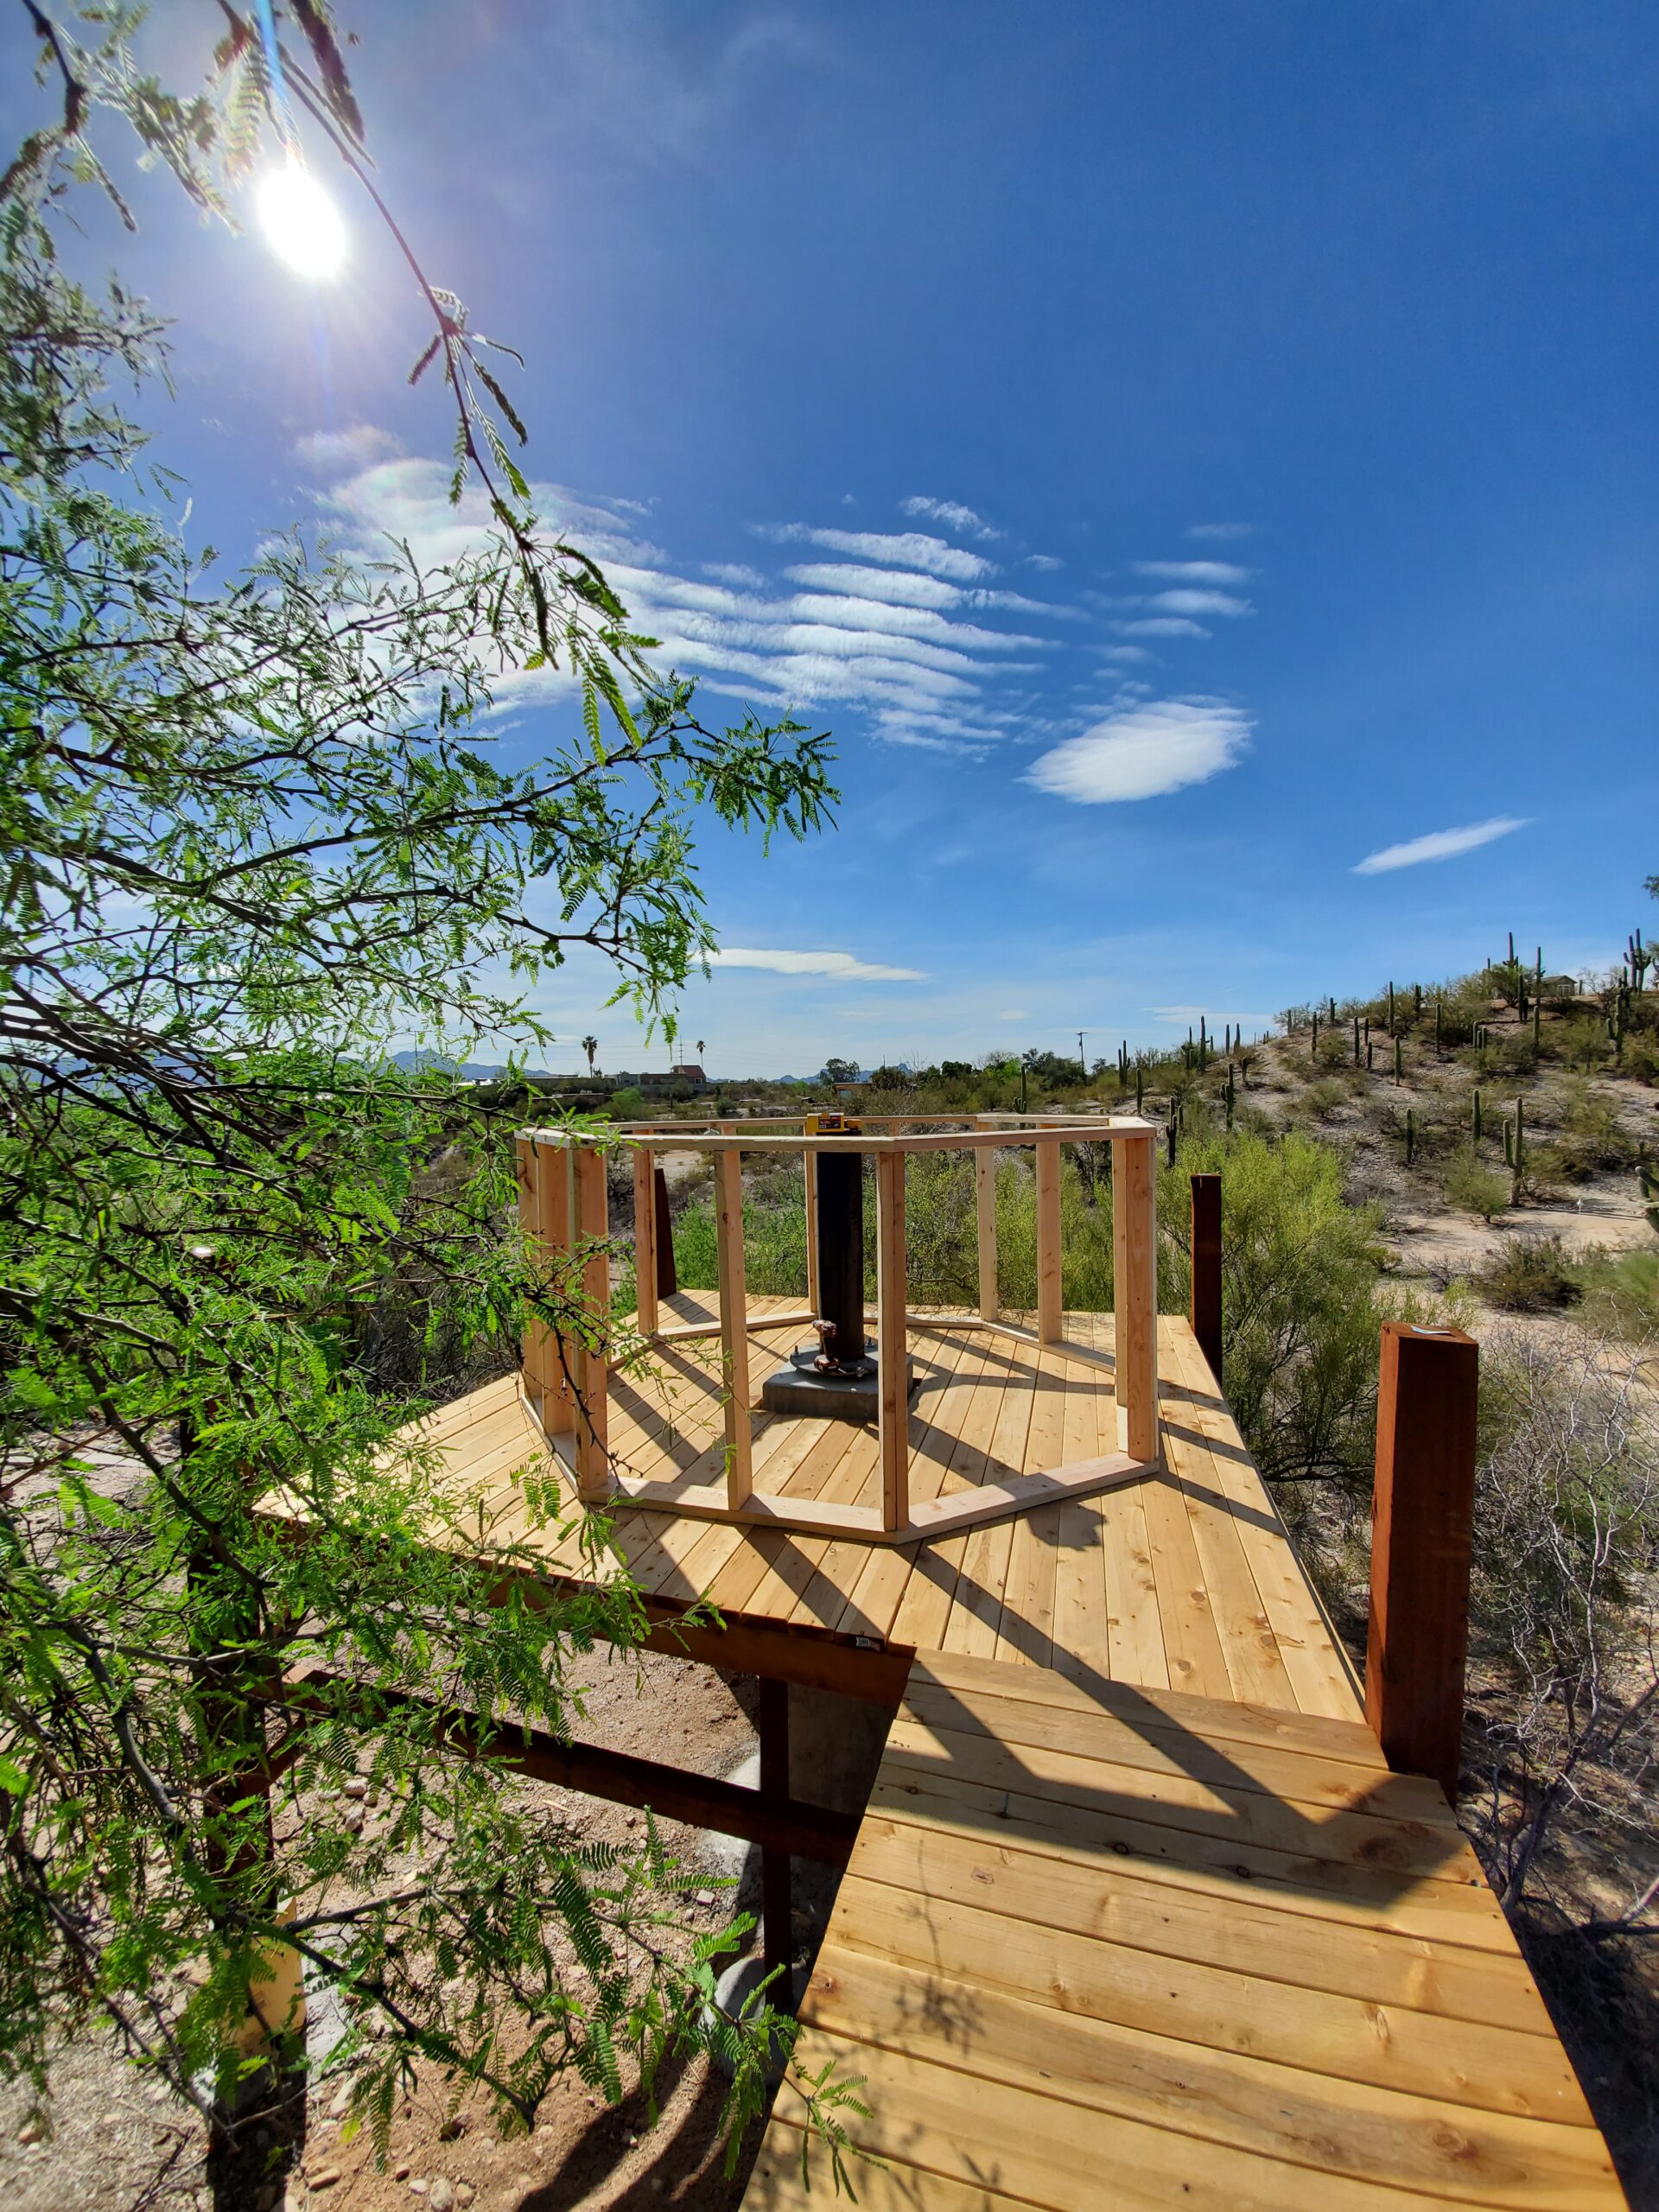
Platform decking complete… Complete with the 24×24 cutout that will surround the concrete pier on which the scope will sit. You can see the bridge to the pool area is also done – I think that’s the coolest part!
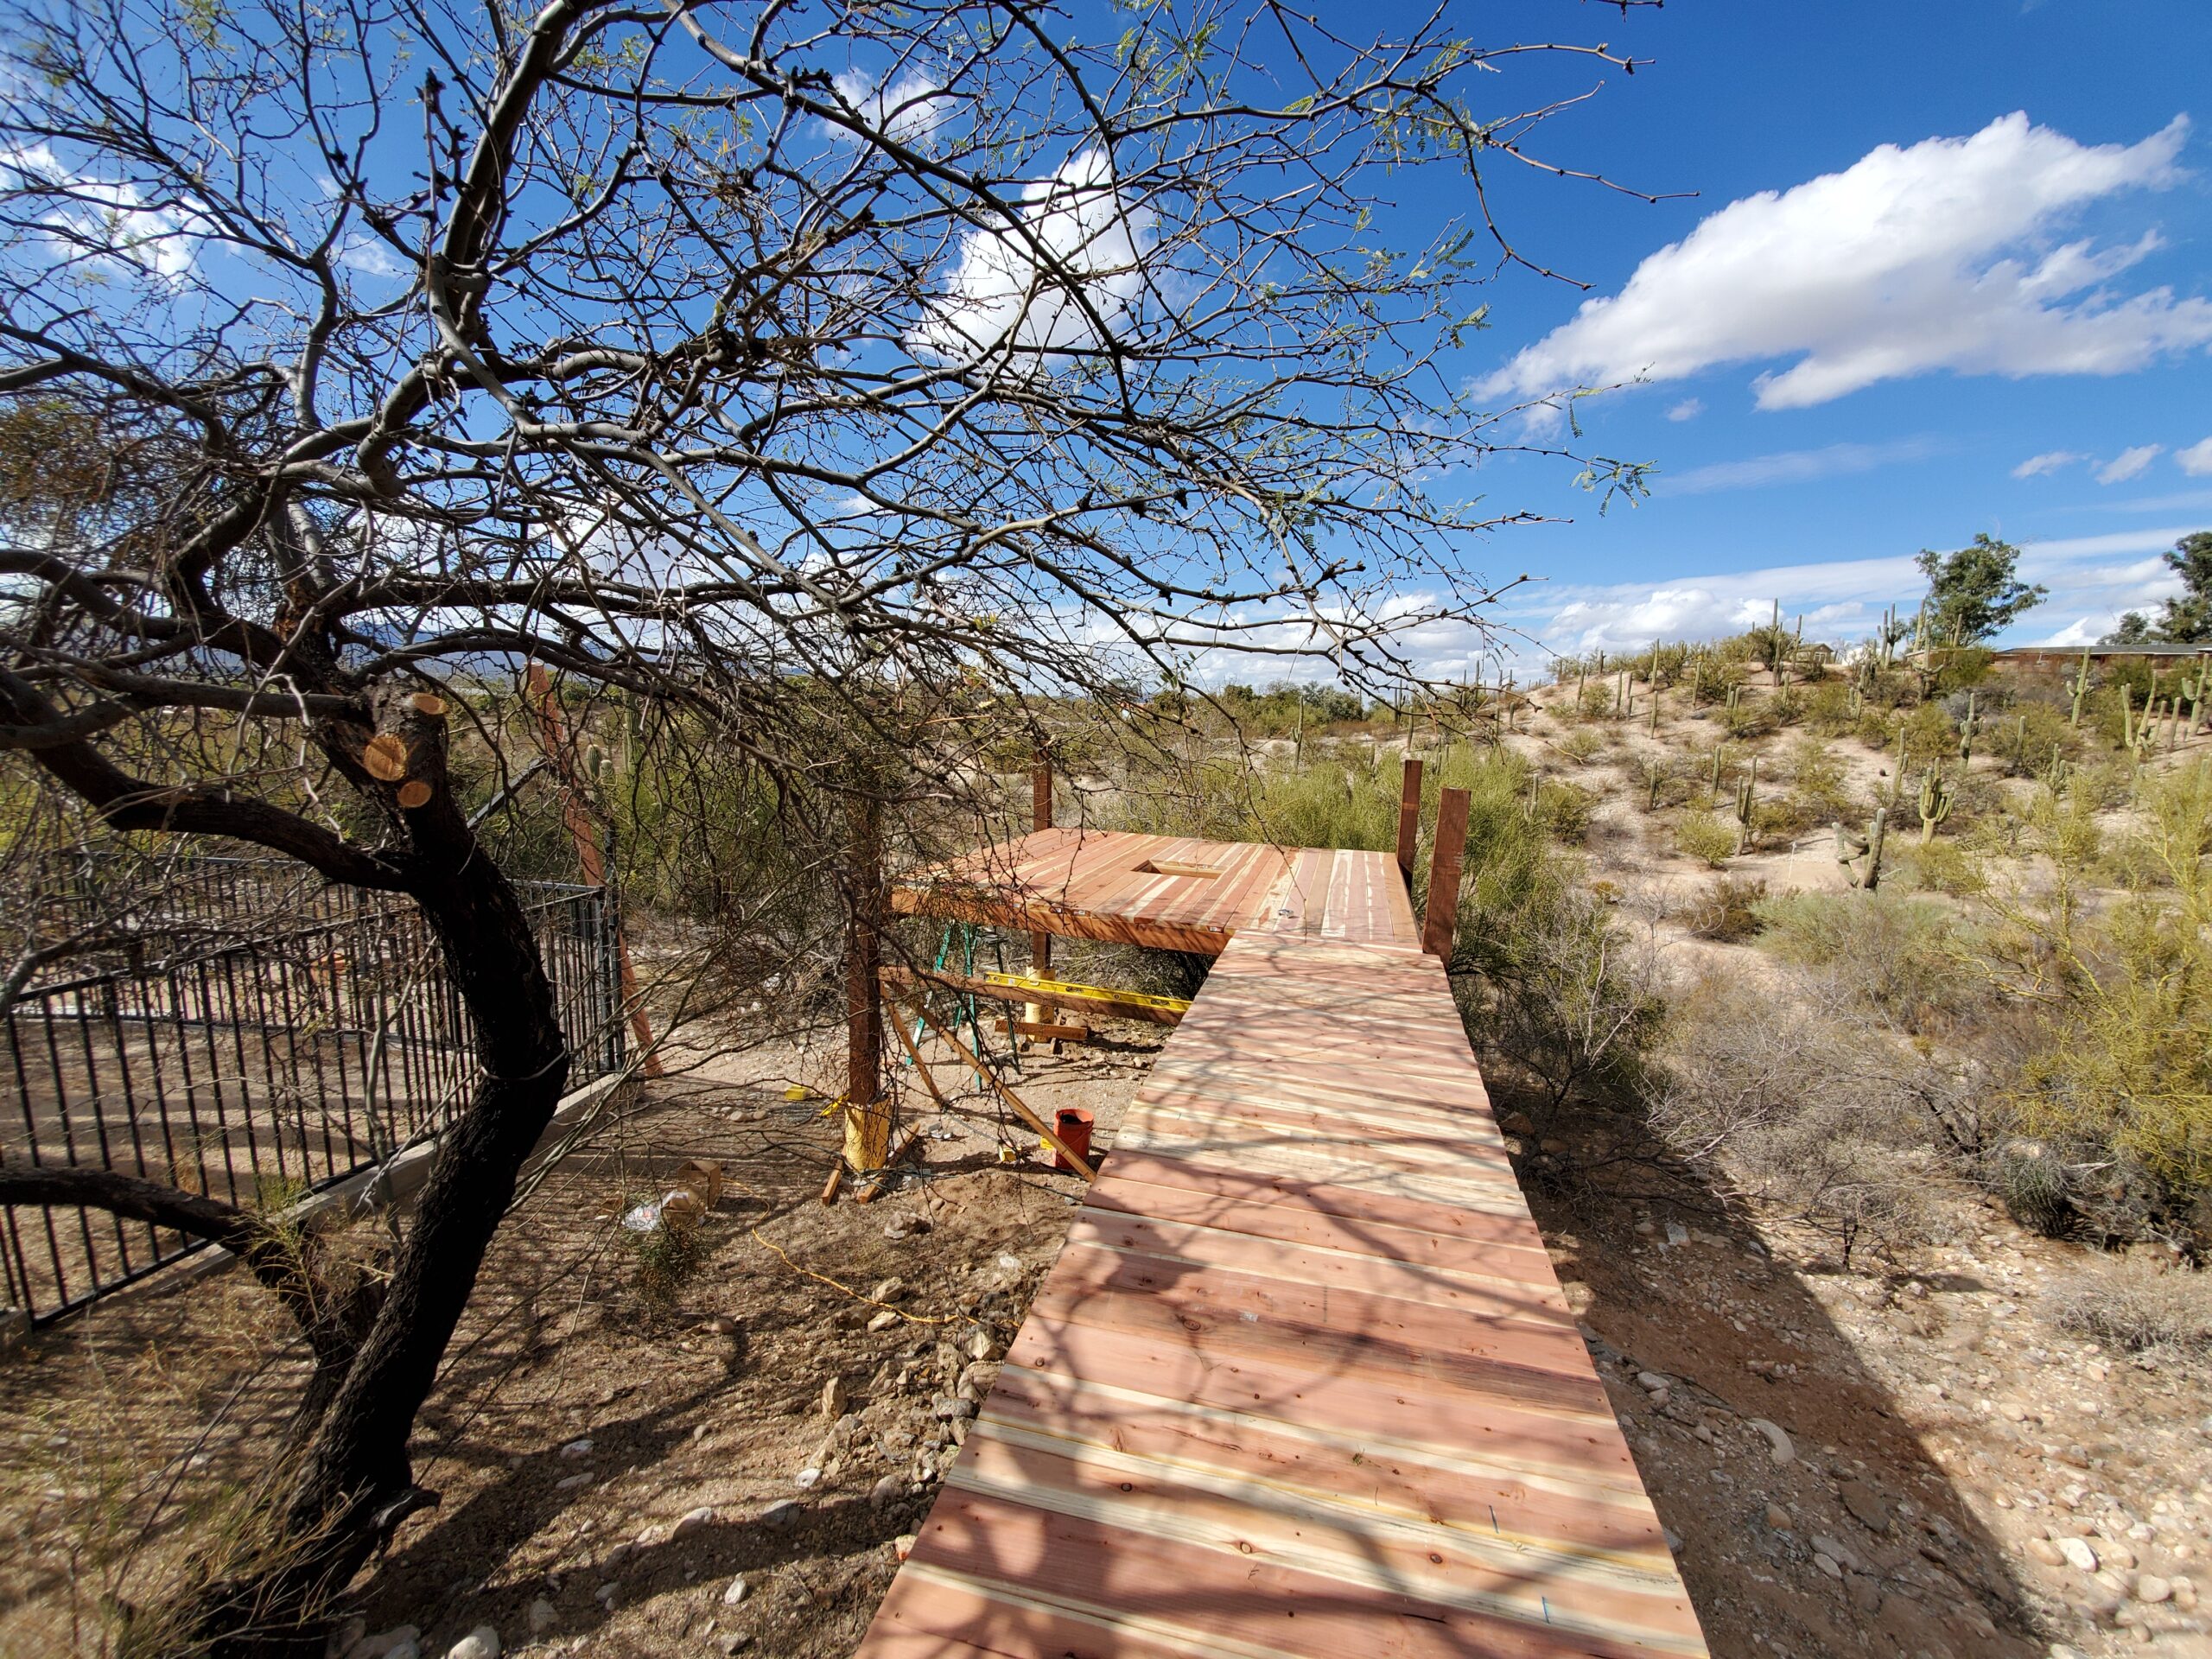
Looking from the pool gate… I know, I know… It looks like a fishing pier. What, you don’t like fishing piers? Who doesn’t like fishing piers?
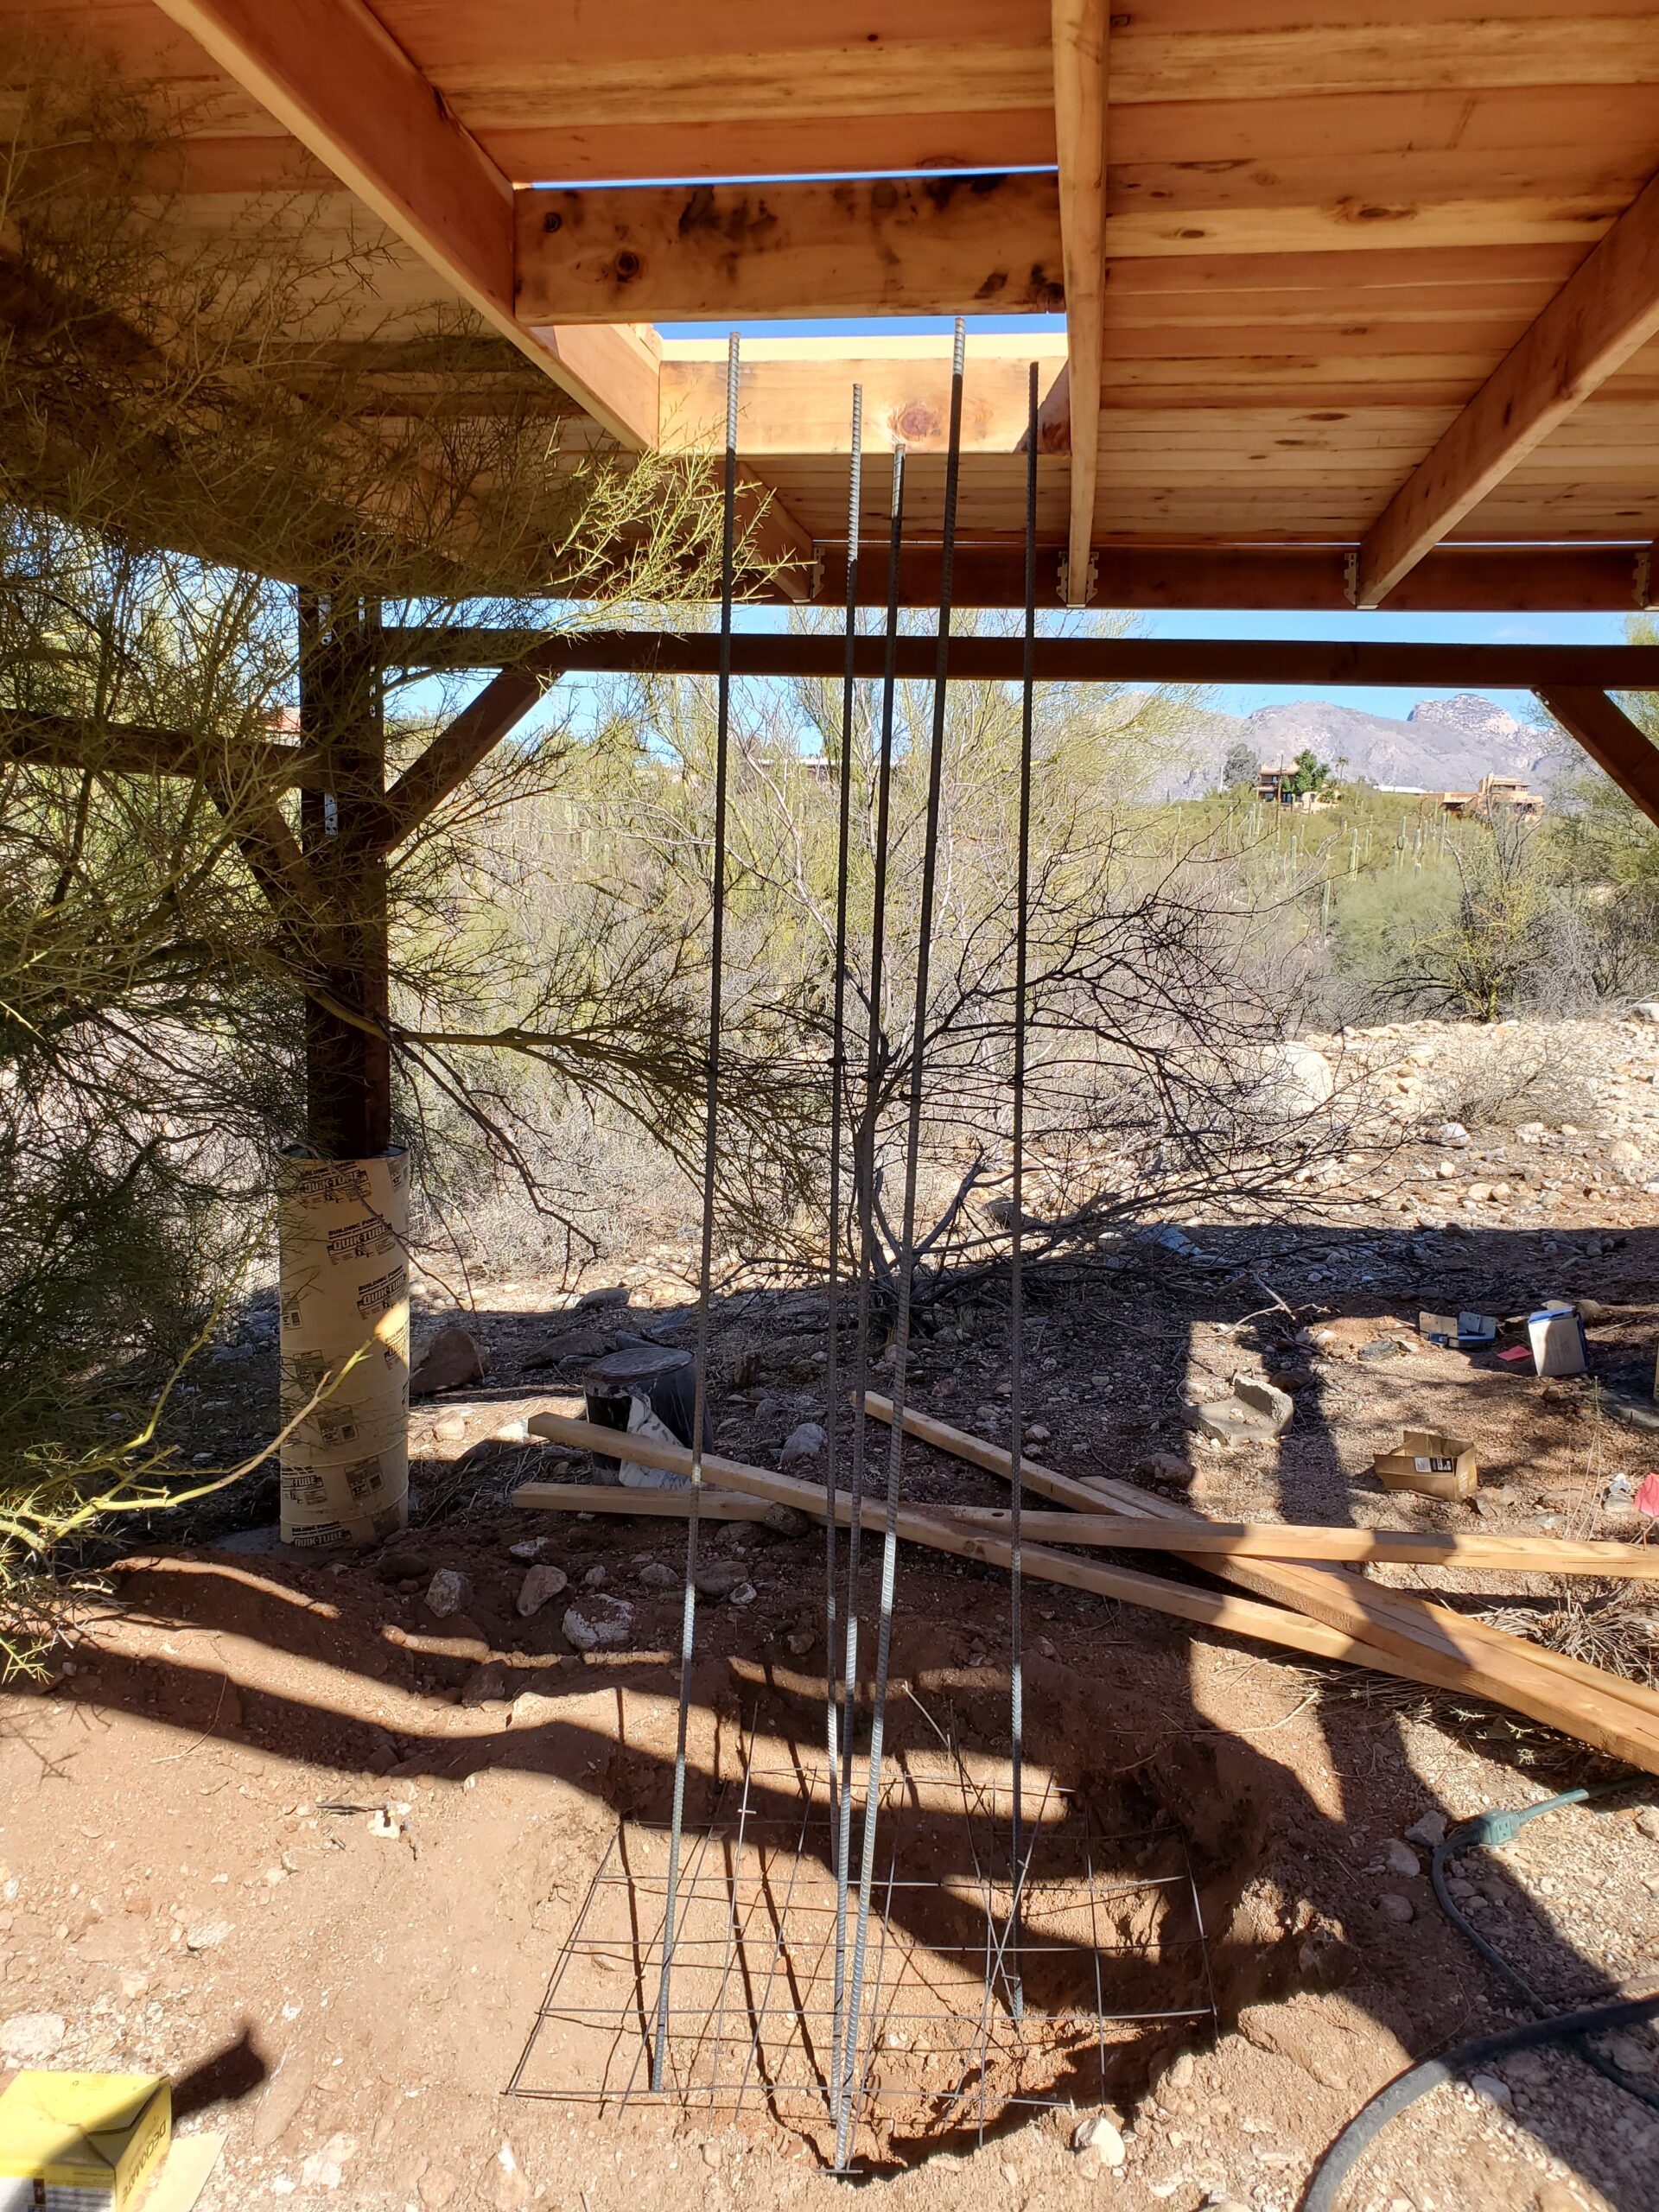
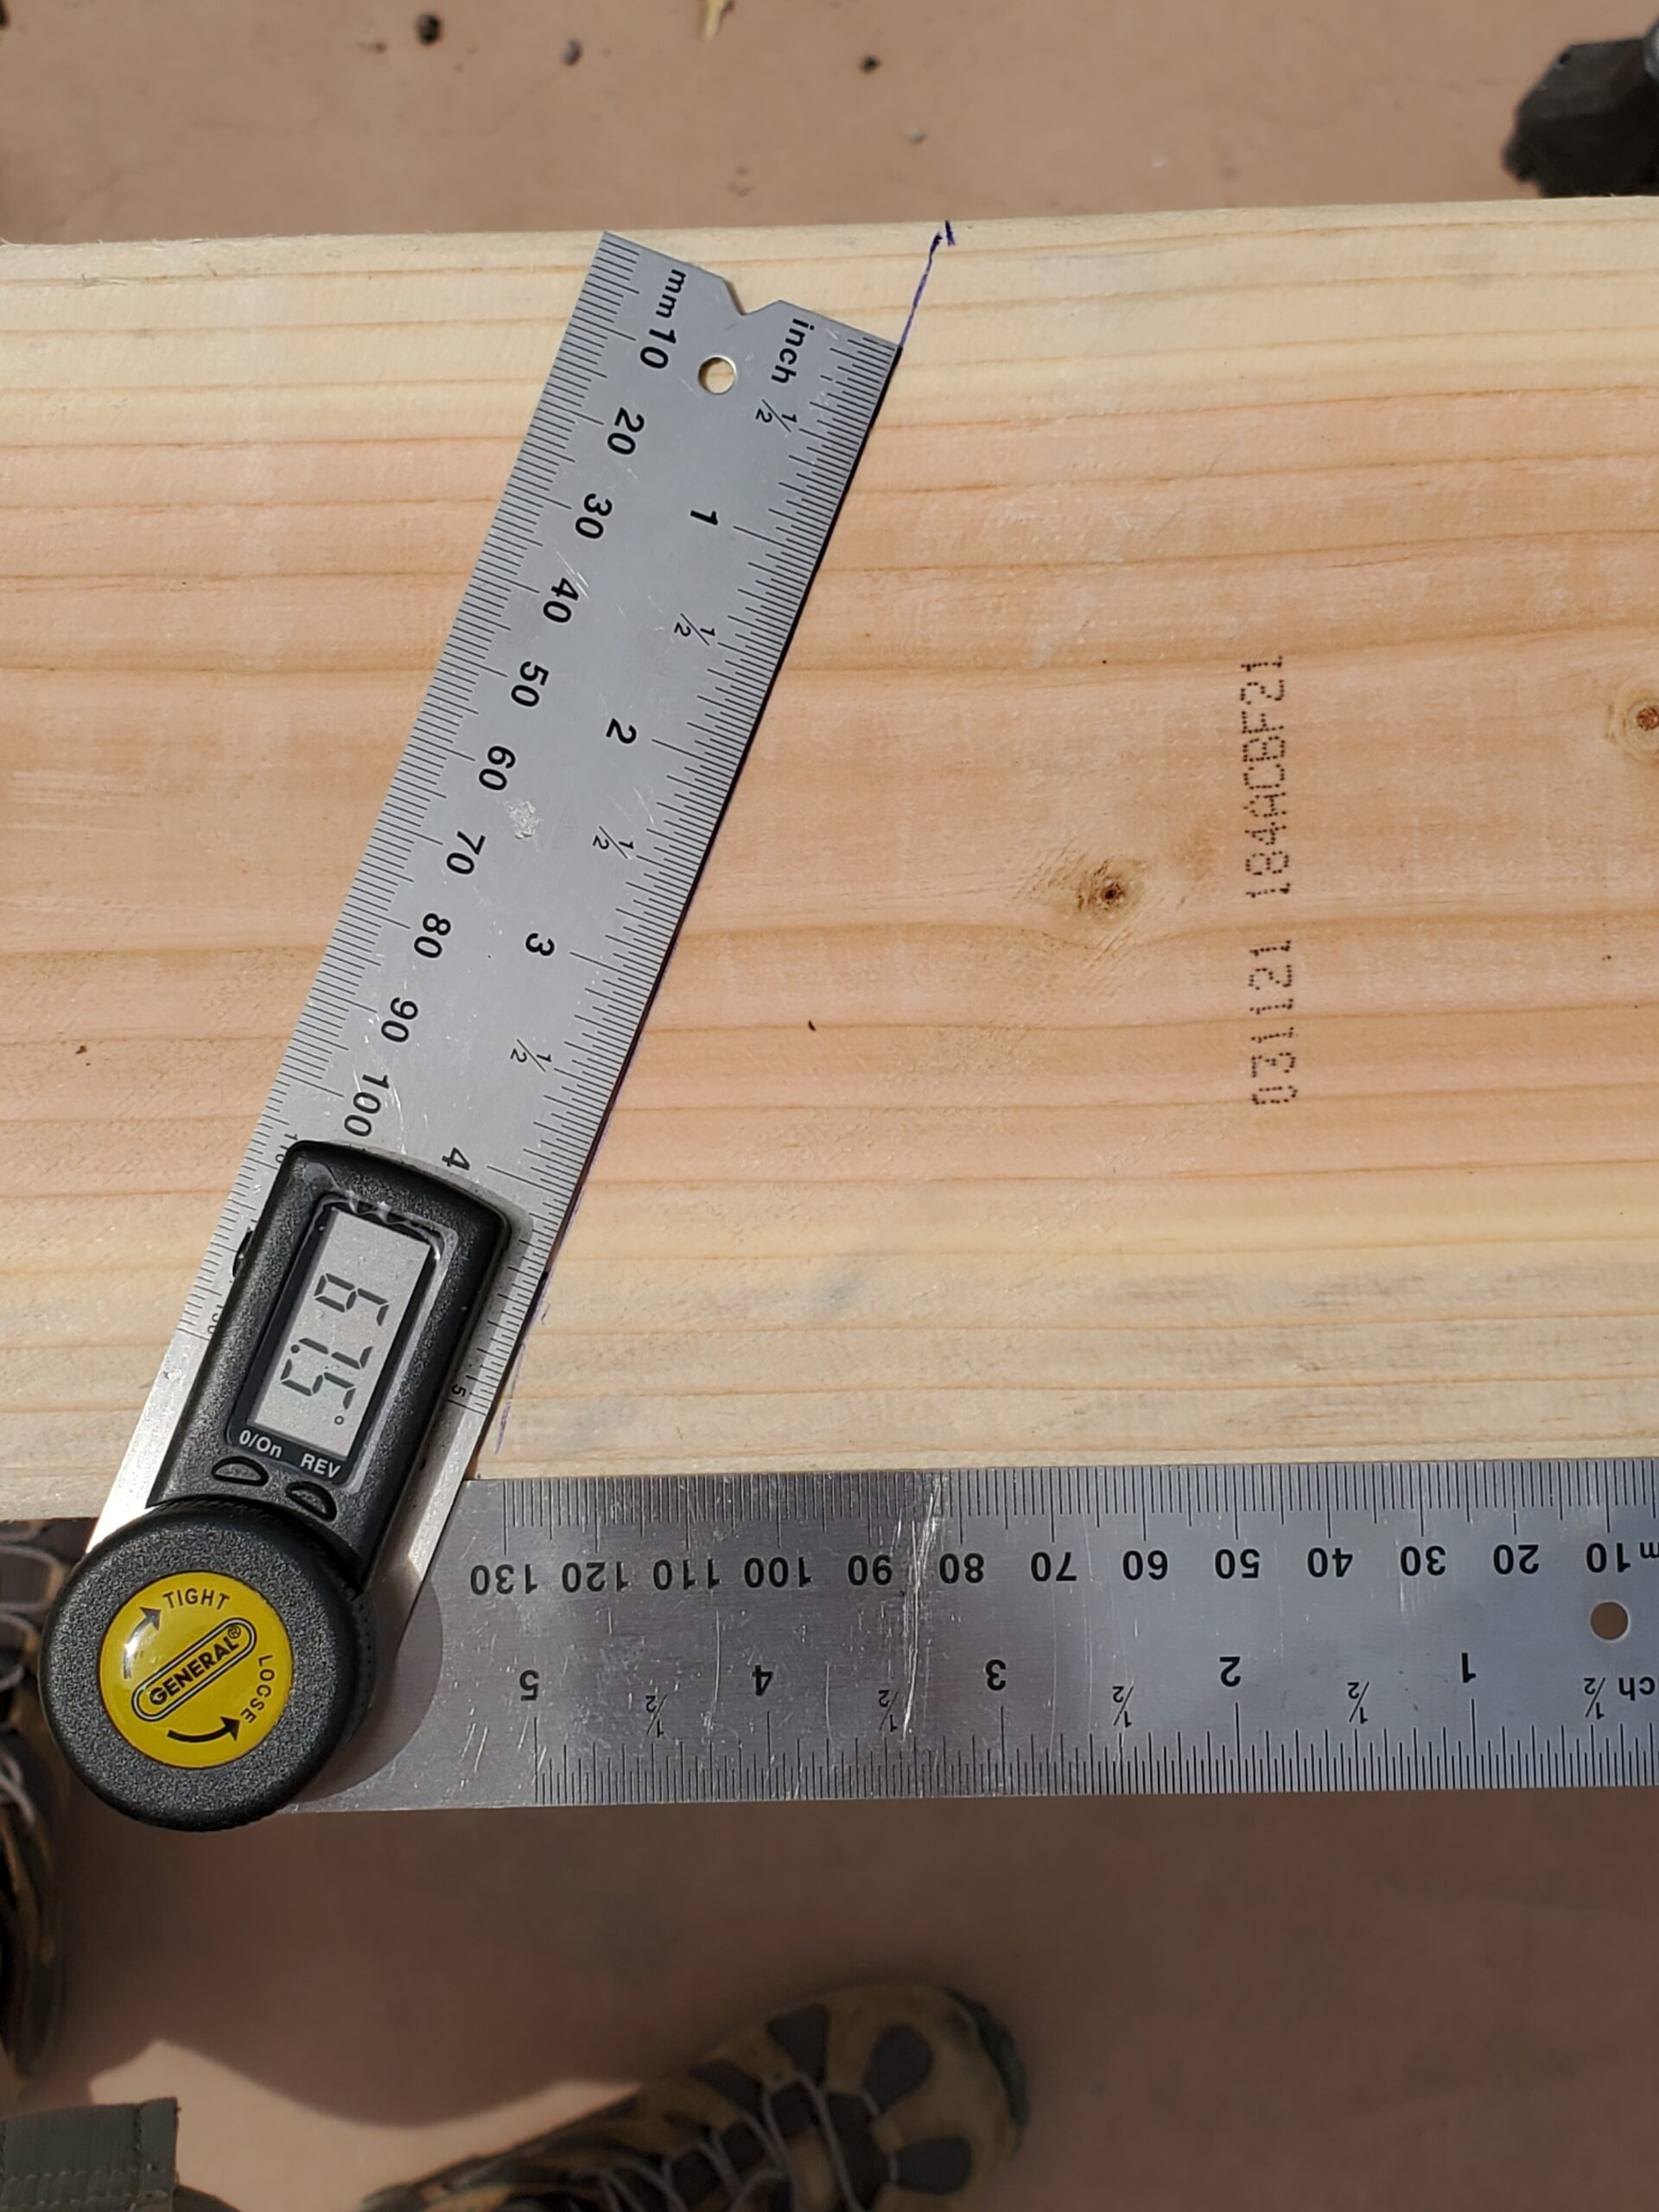
Now starting the part that makes it a real observatory fit for long exposure astrophotography; the giant hunk of concrete, isolated from the vibrations of platform, on which the steel scope pier will sit. There’s a shot of the perfect 1/2″ gap (measure measure measure, cut) between the concrete and the platform coming up in a bit.

Ya know, I actually thought this flimsy assemblage of plywood and 2x4s would hold back 6000lbs of concrete… HAH!
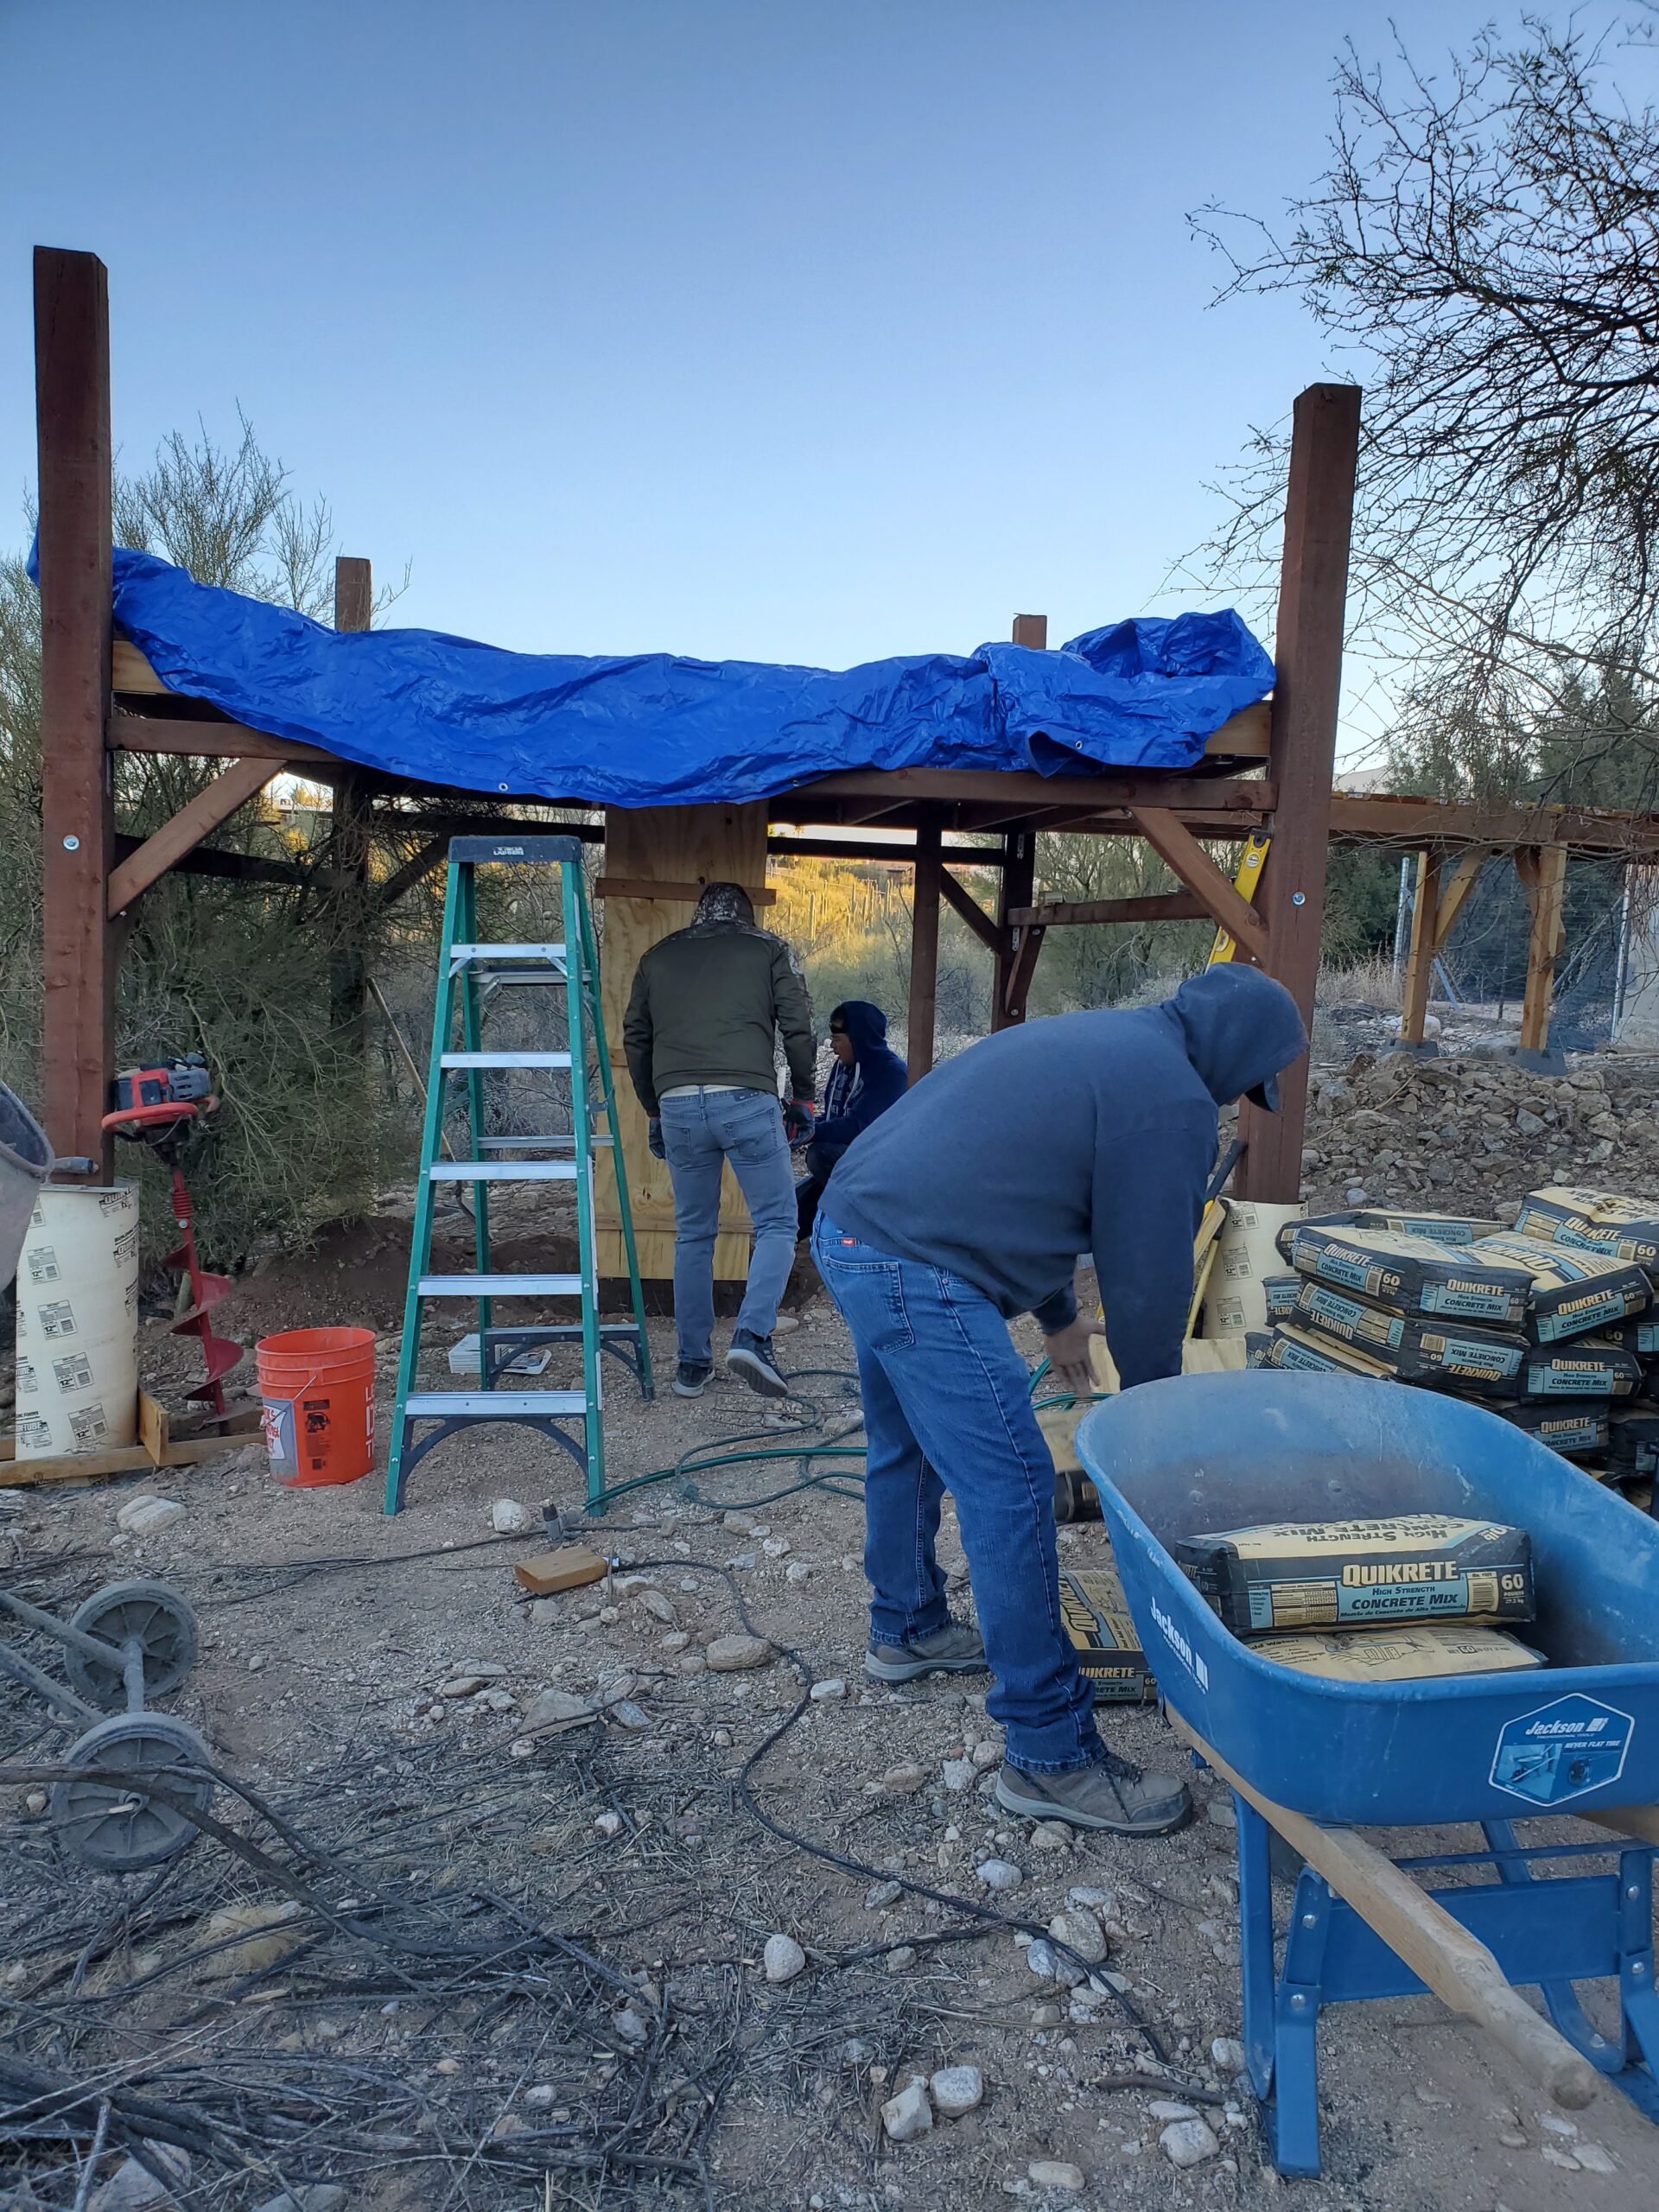
How many 60lb bags? 200… that’s how many… Yes, for this part, I got help. That’s why I’m not dead right now.
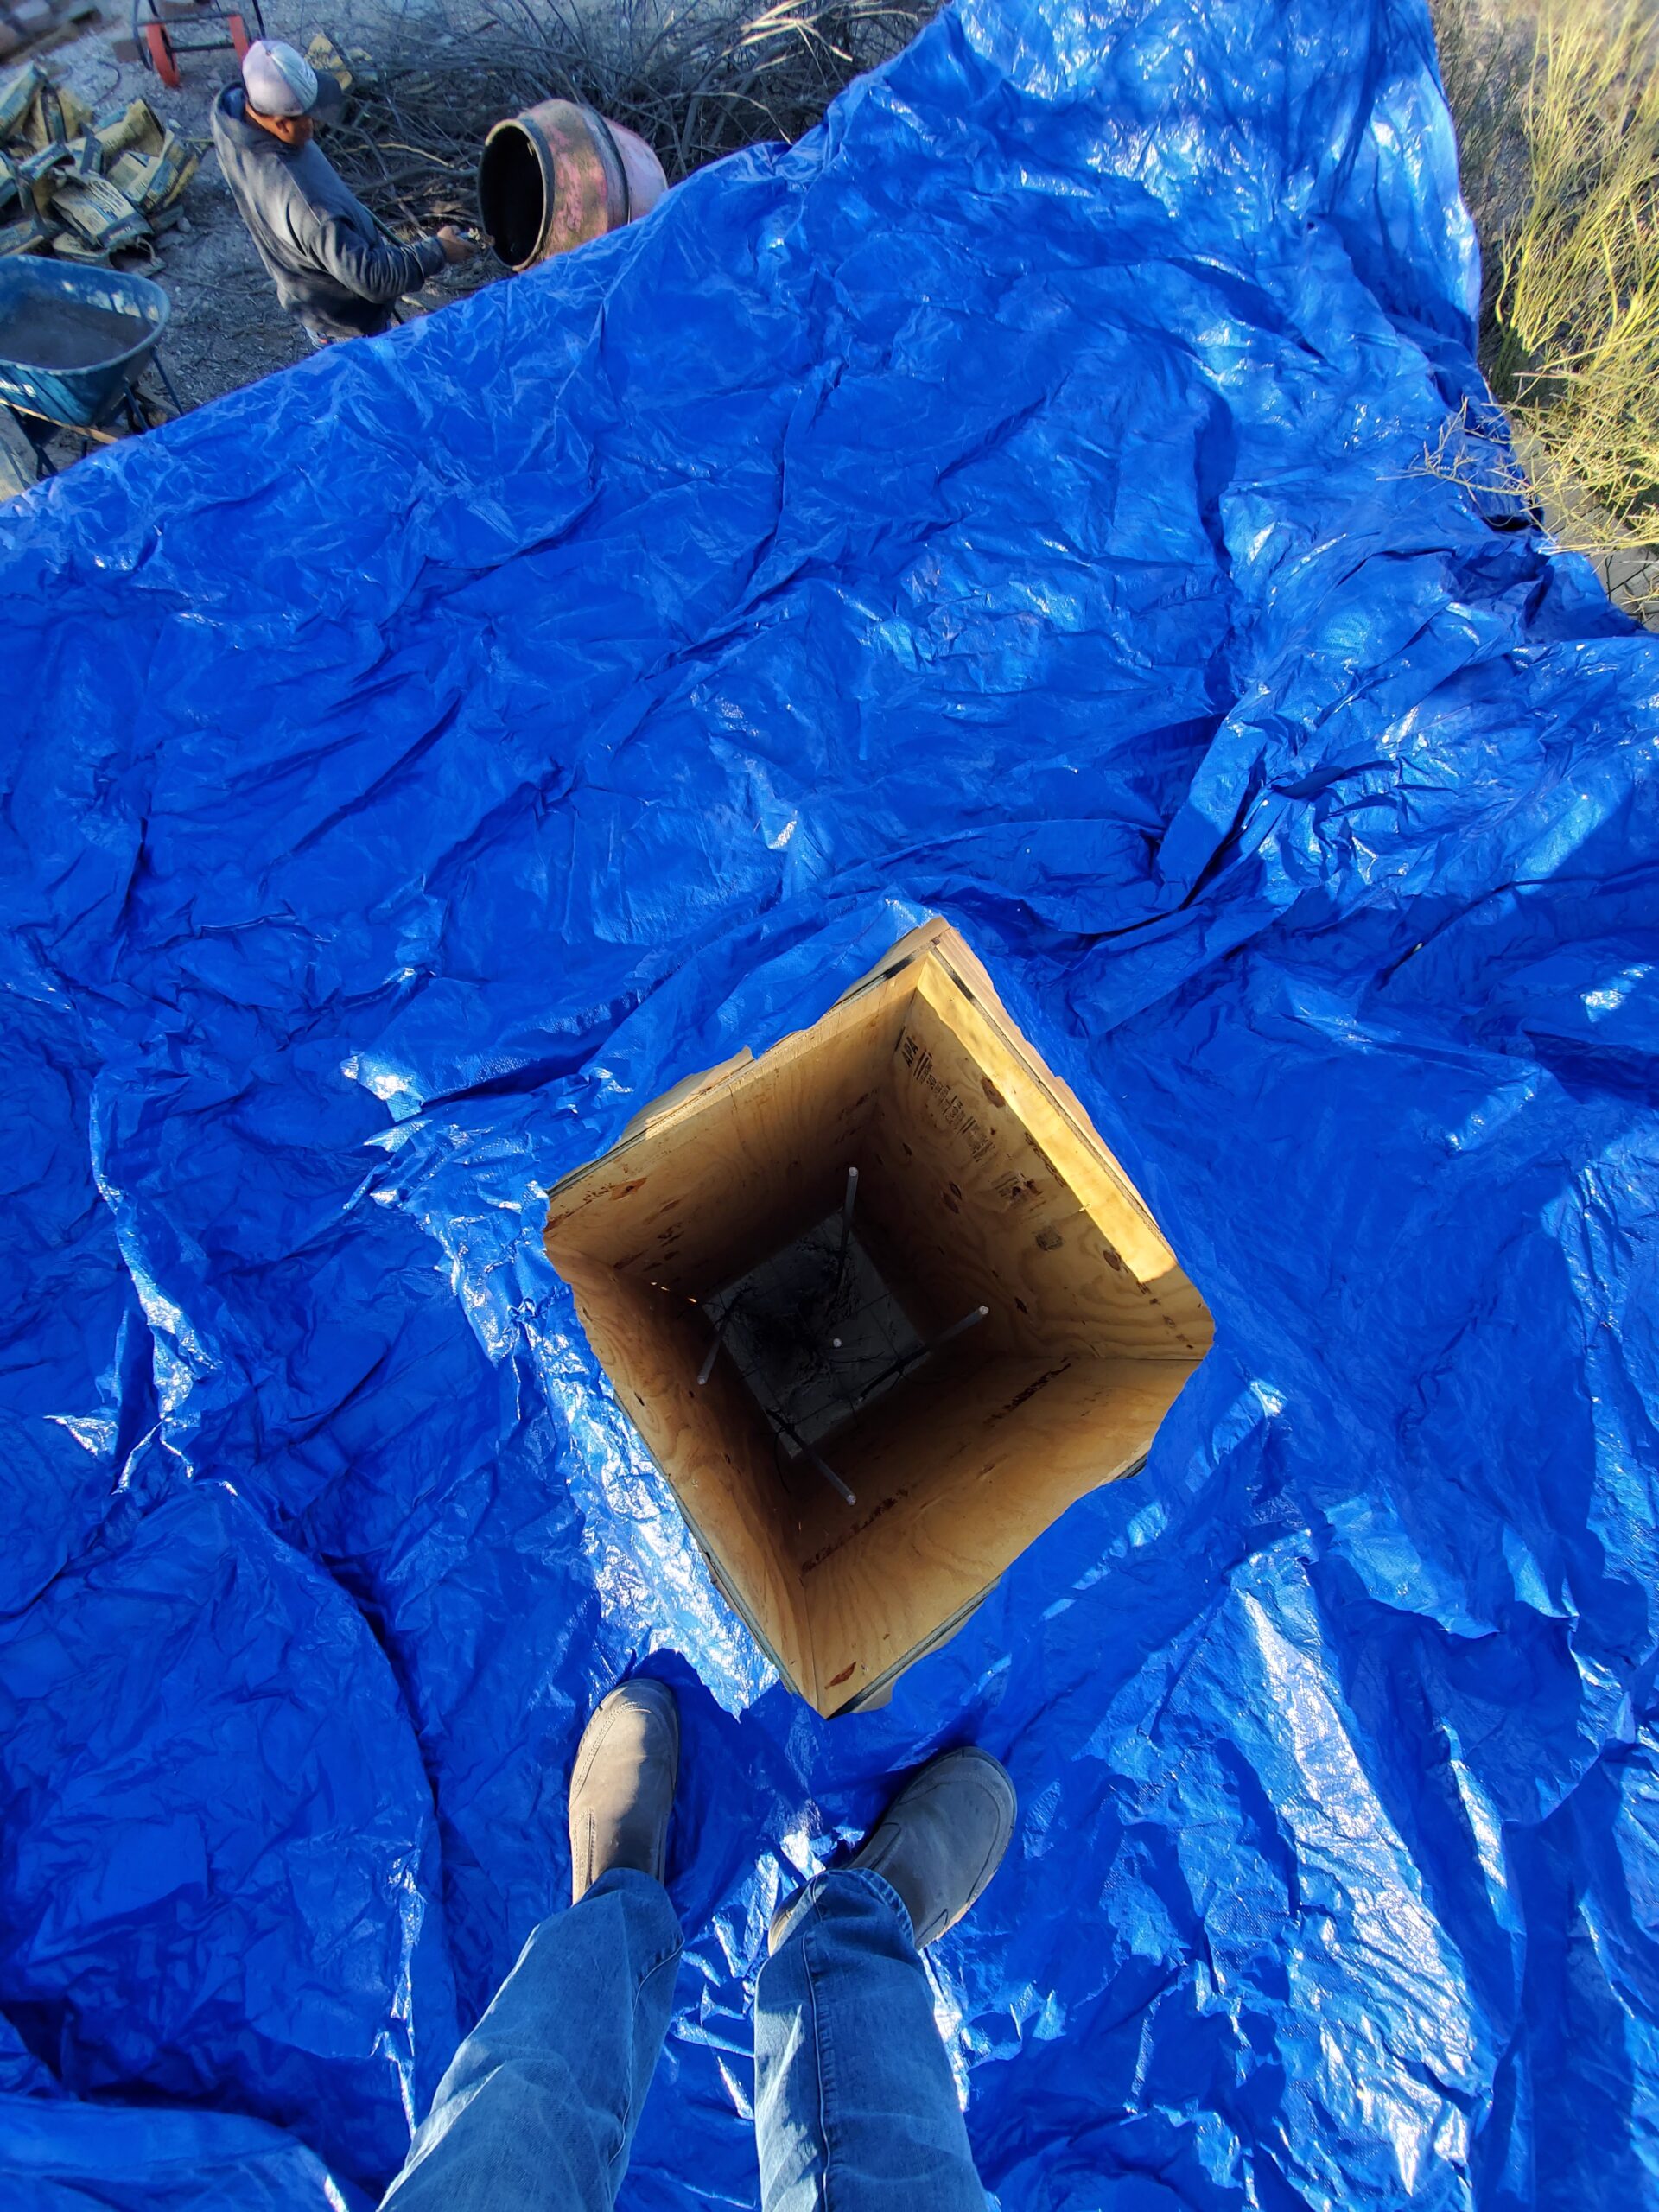
Those are my feet, and that’s the empty pier form, ready for the pour.
And like magic, 6 hours of concrete hoisting later, it’s done!
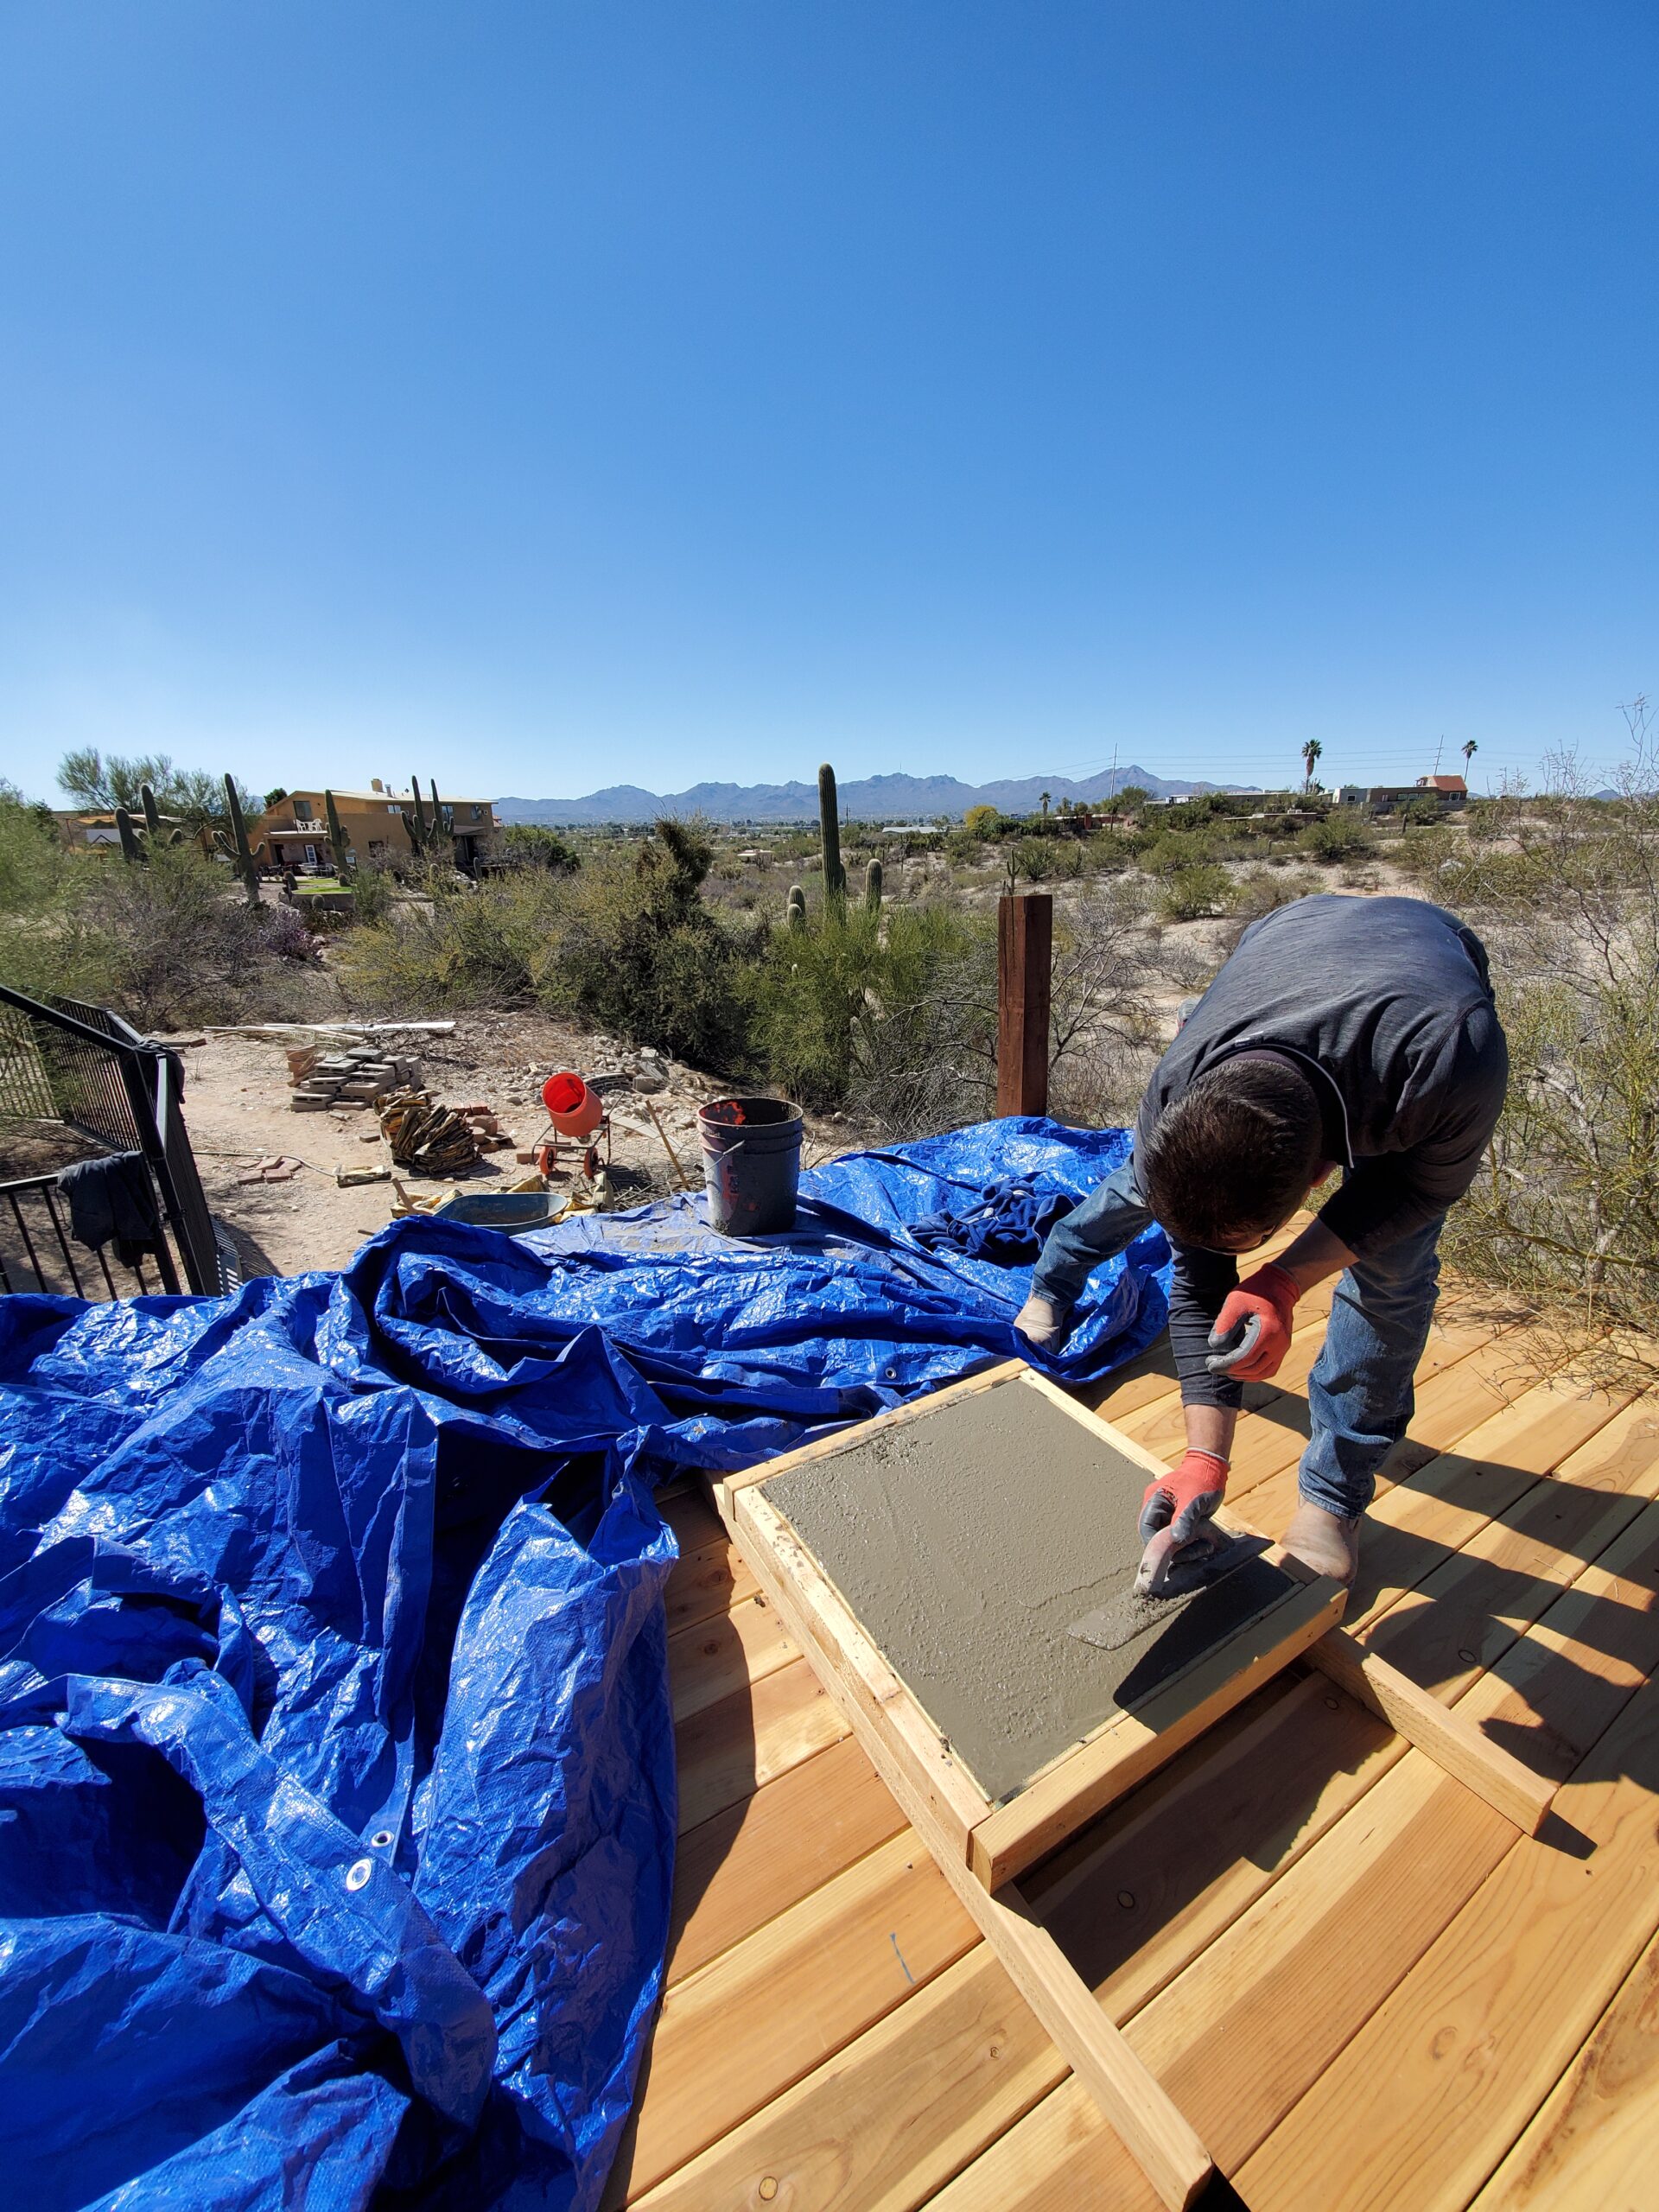
Remember what I said about overestimating the strength of the form??? This is what it took to prevent a mess of truly epic proportions…
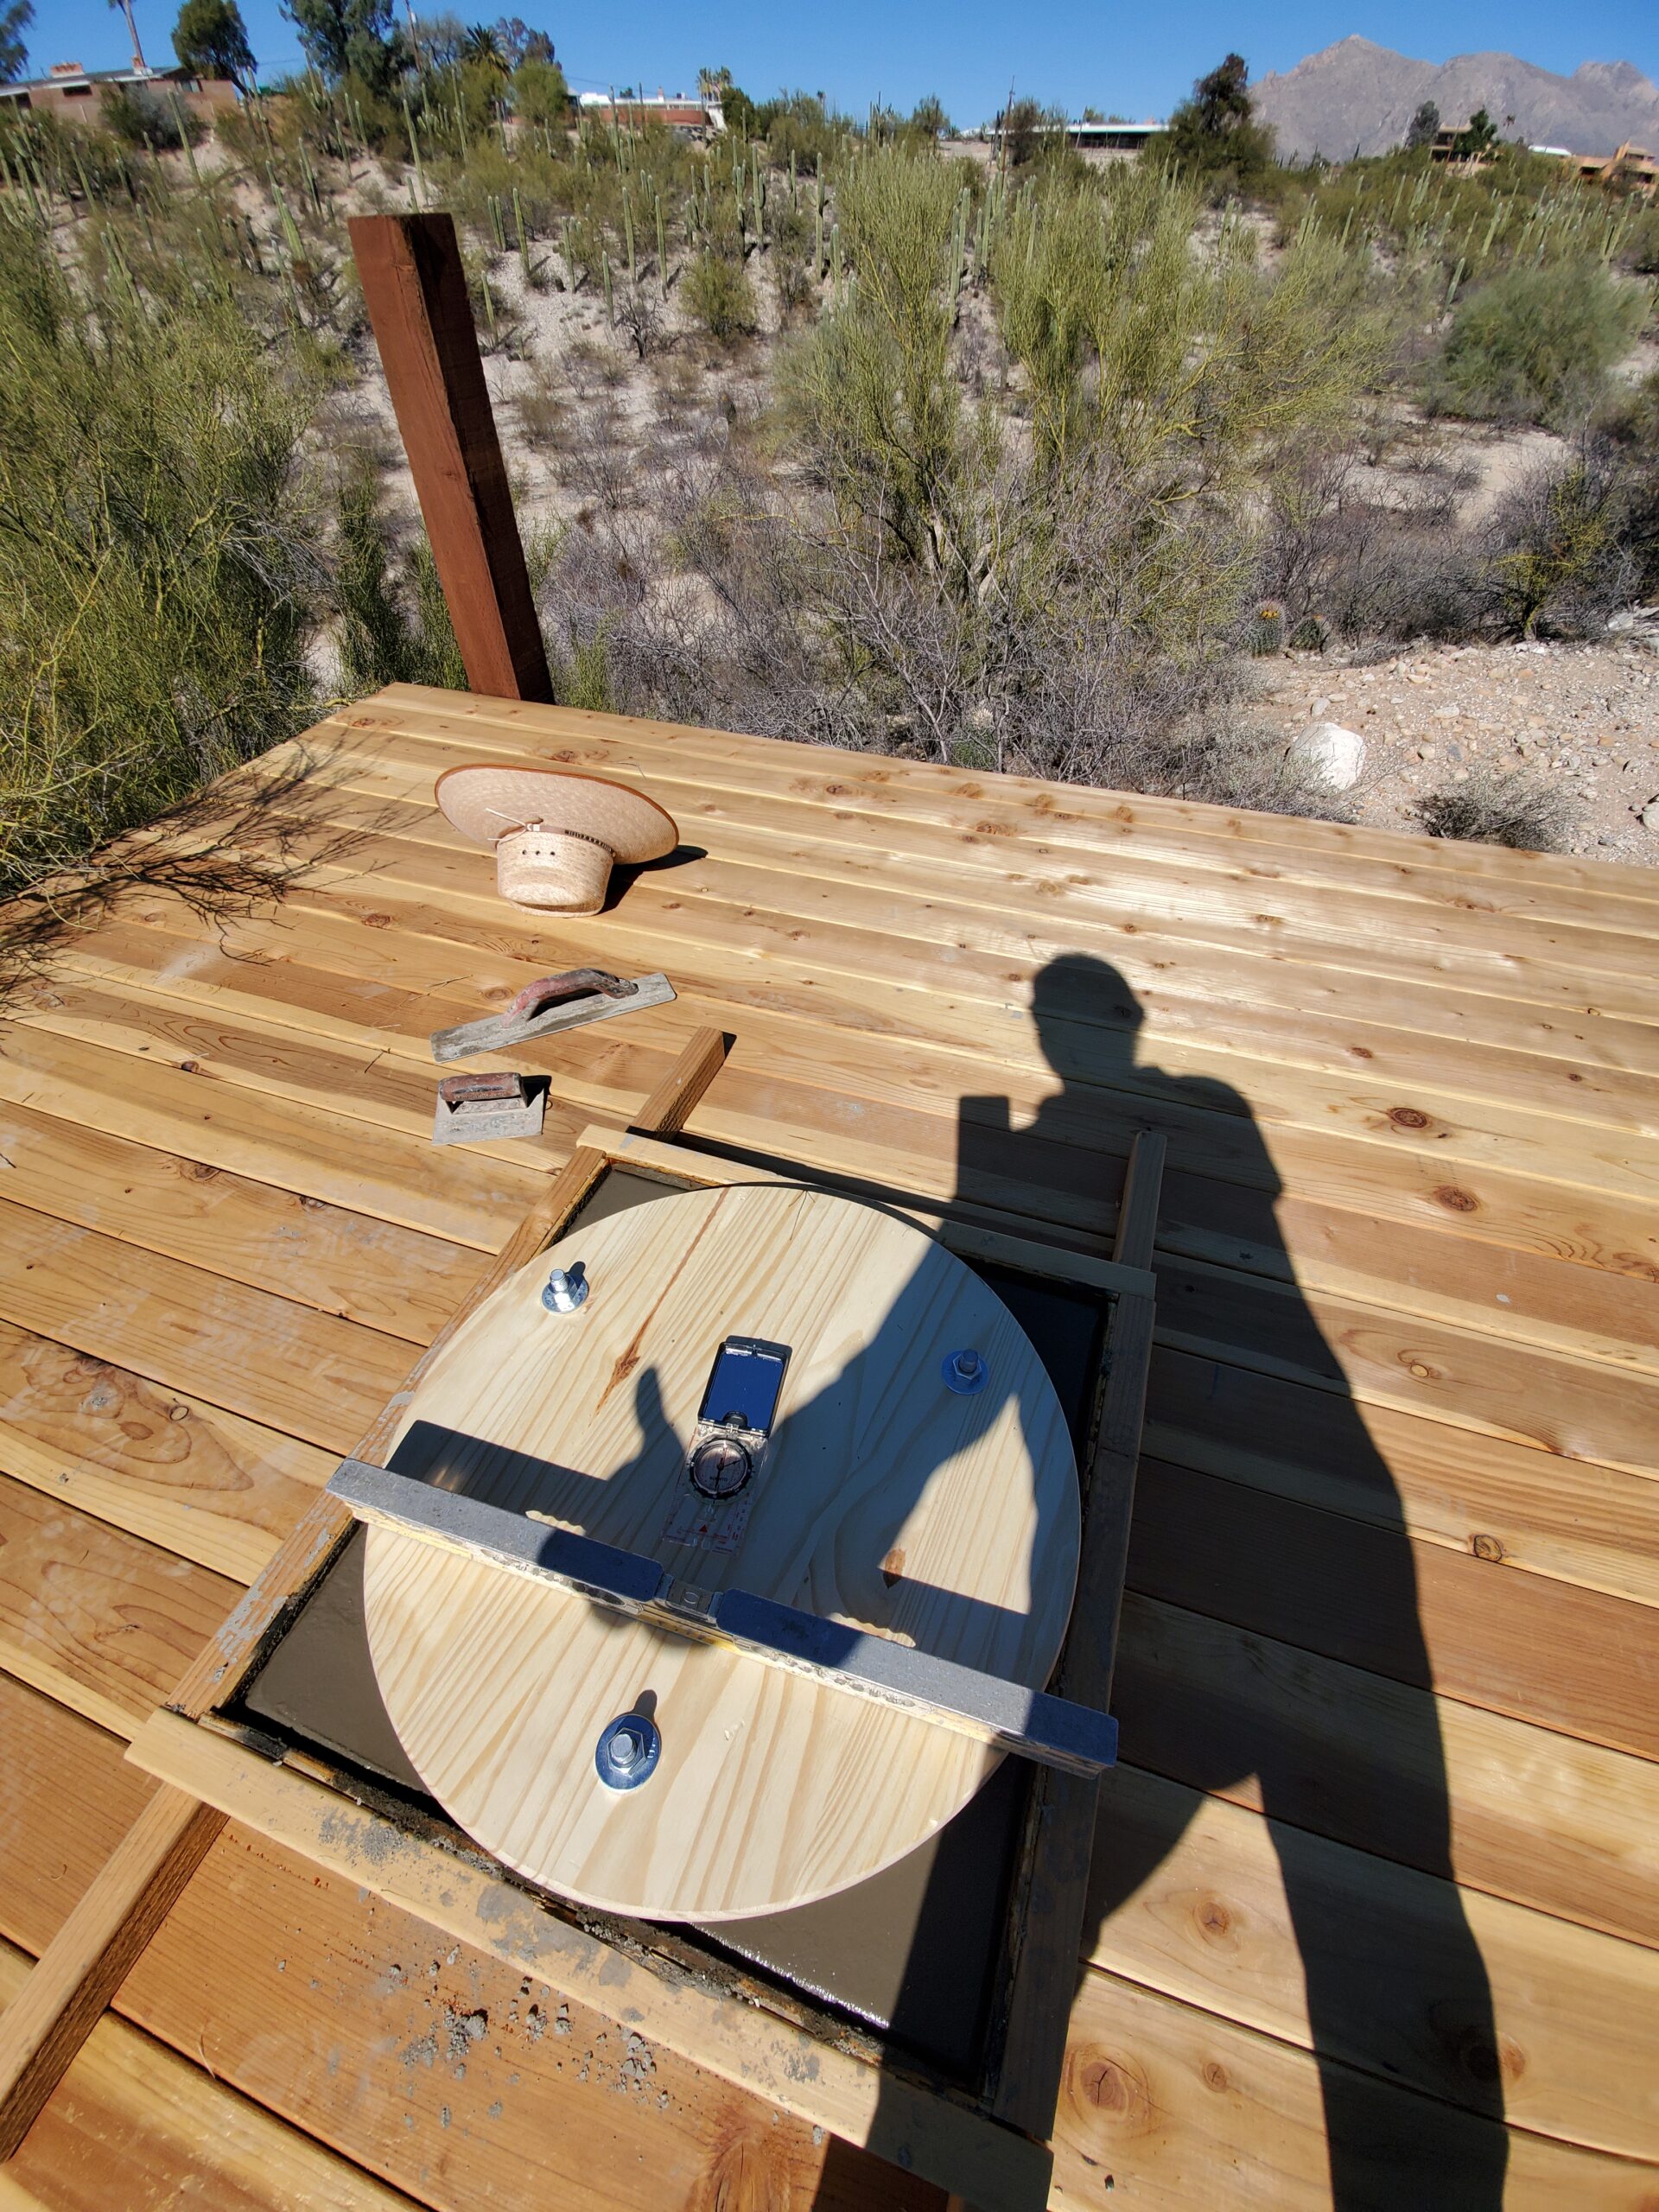
The steel telescope pier that’s gonna sit on the concrete pier has 3 bolt holes in the base. I made a template for the bolt holes by sitting the pier on a pre-cut 24″ round table top from Home Depot. I just drilled straight through the holes in the base to create matching holes in the table top. Then I attached J bolts, designed to be stuck in concrete, to the table top, and very carefully set the template on the still wet concrete, sinking the J bolts. You can see the compass I used to ensure the North facing part of the pier will actually be facing North, and the level to… you know… level…
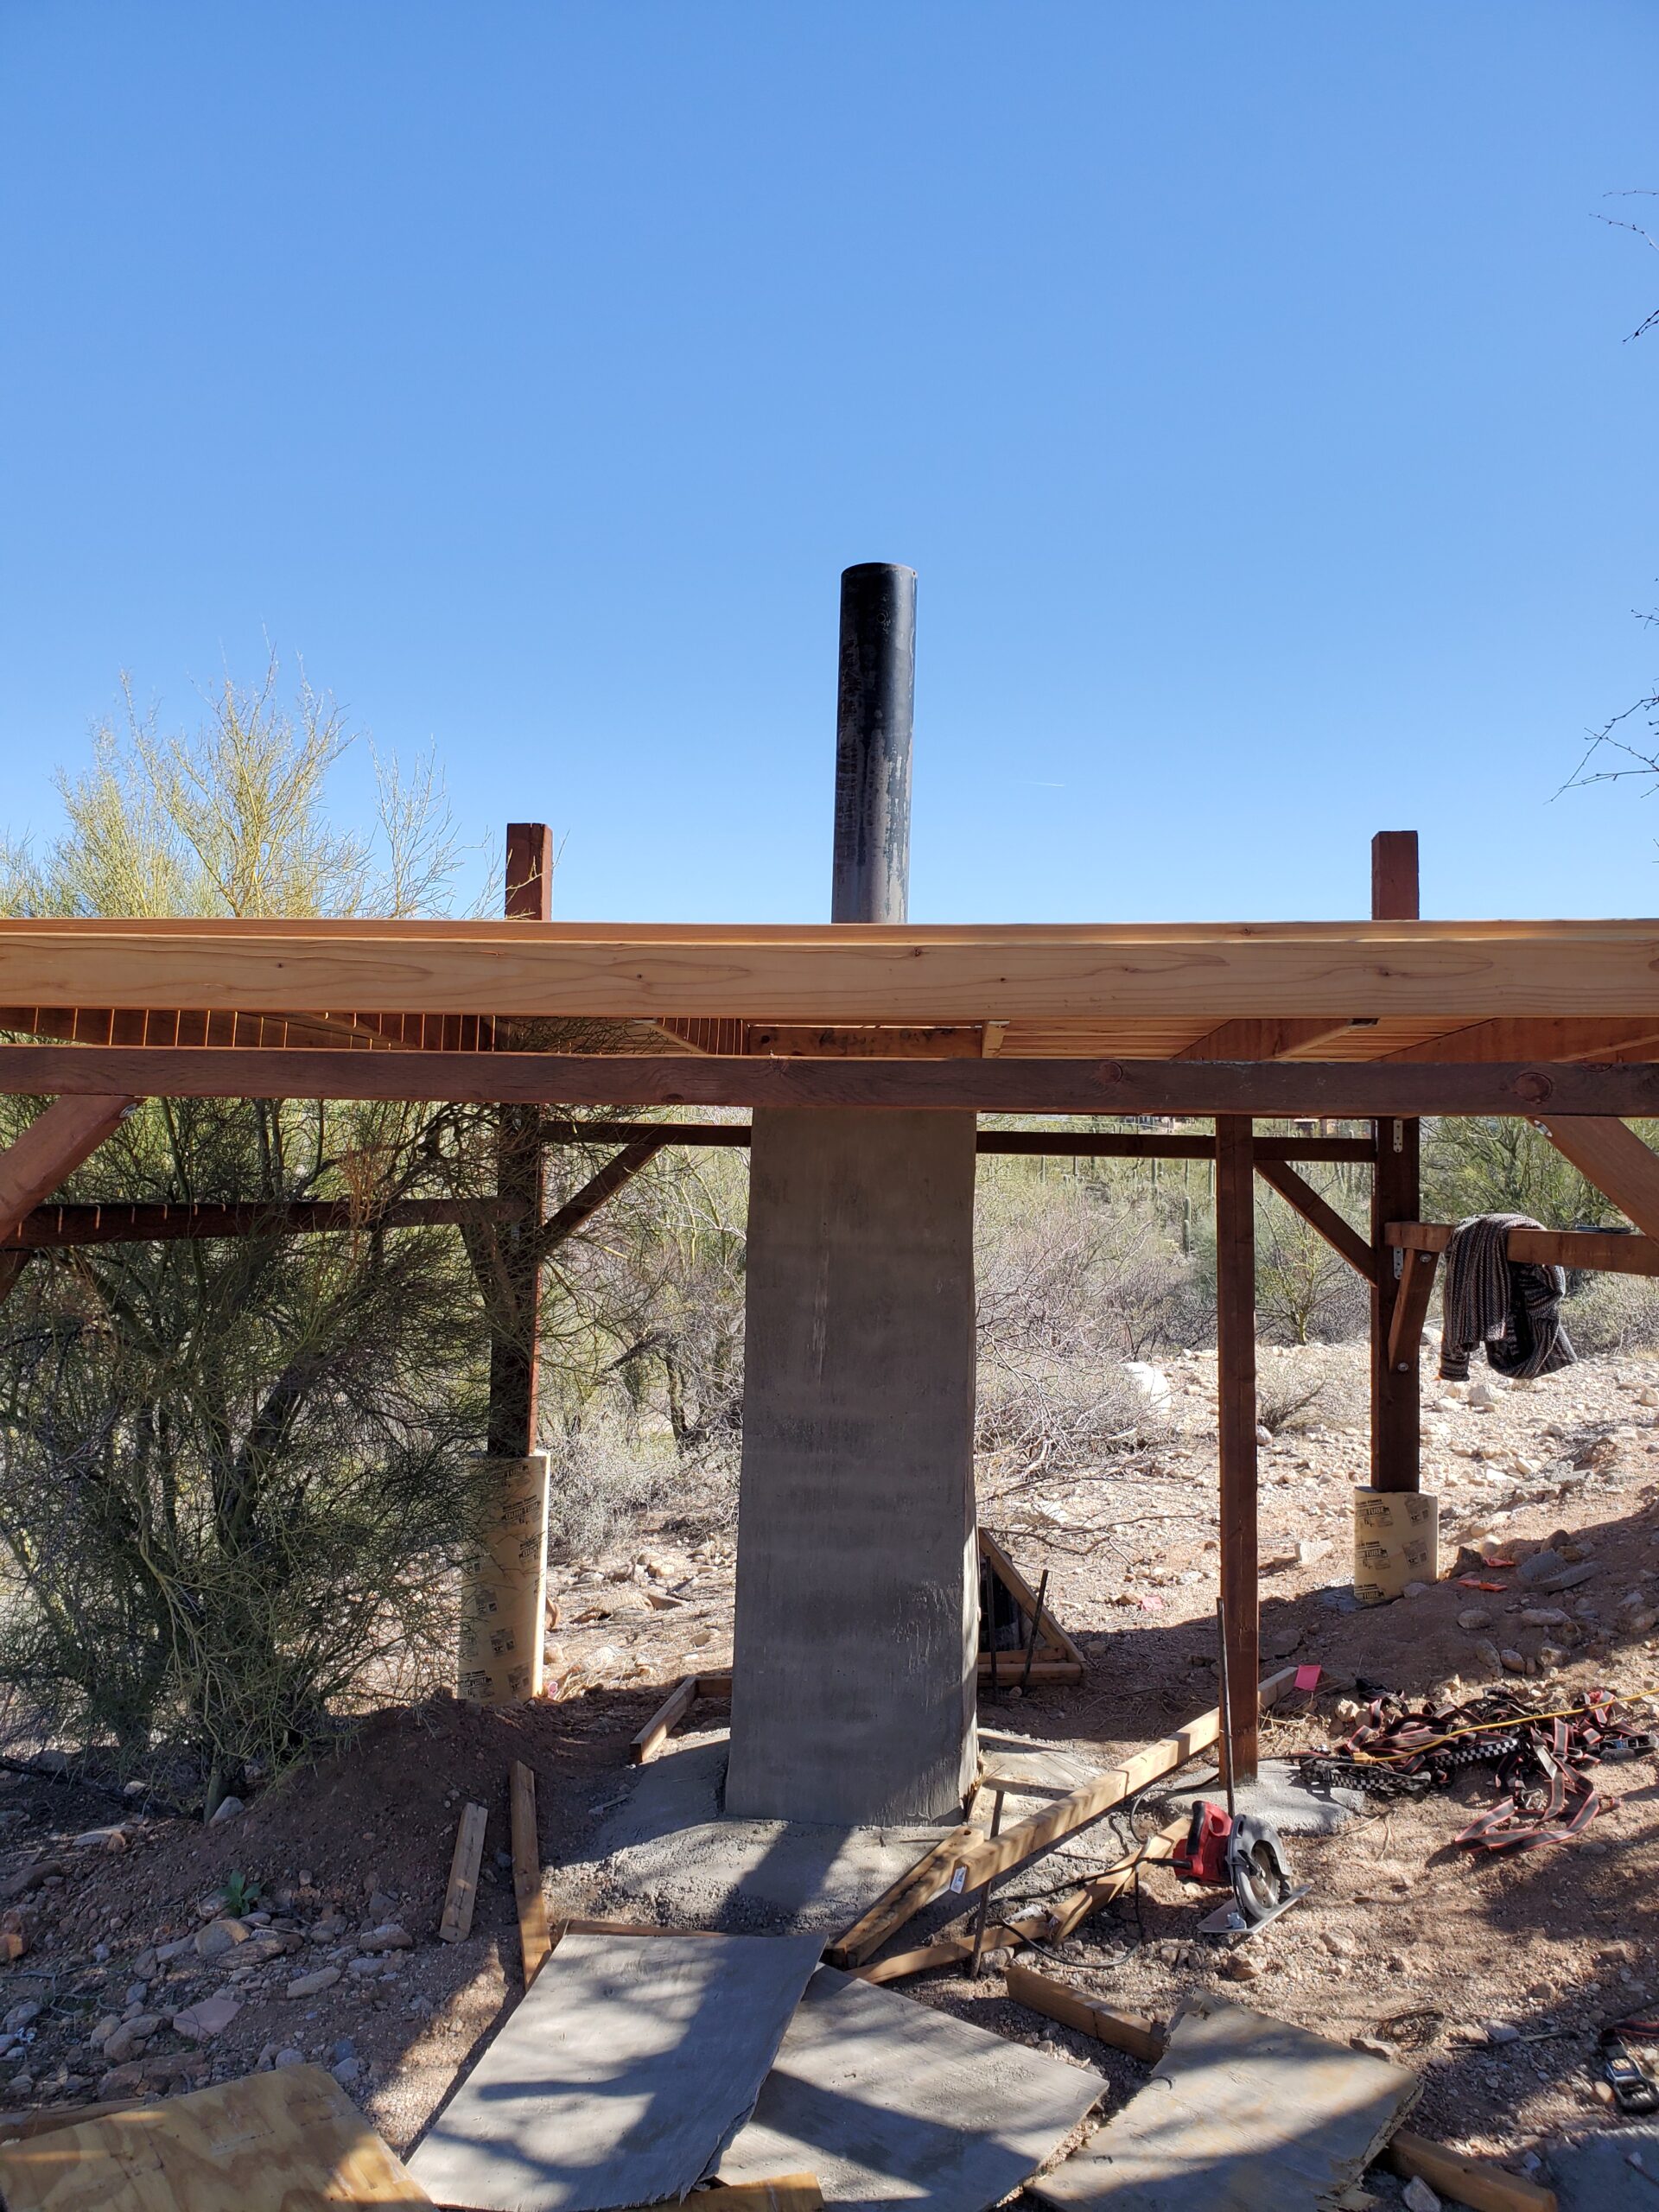
This steel telescope pier has been sitting outside waiting for this exact moment since I bought it in 1998. I am not ashamed to admit I shed a little tear of joy when it finally slipped onto the mounting bolts with a satisfying thud.
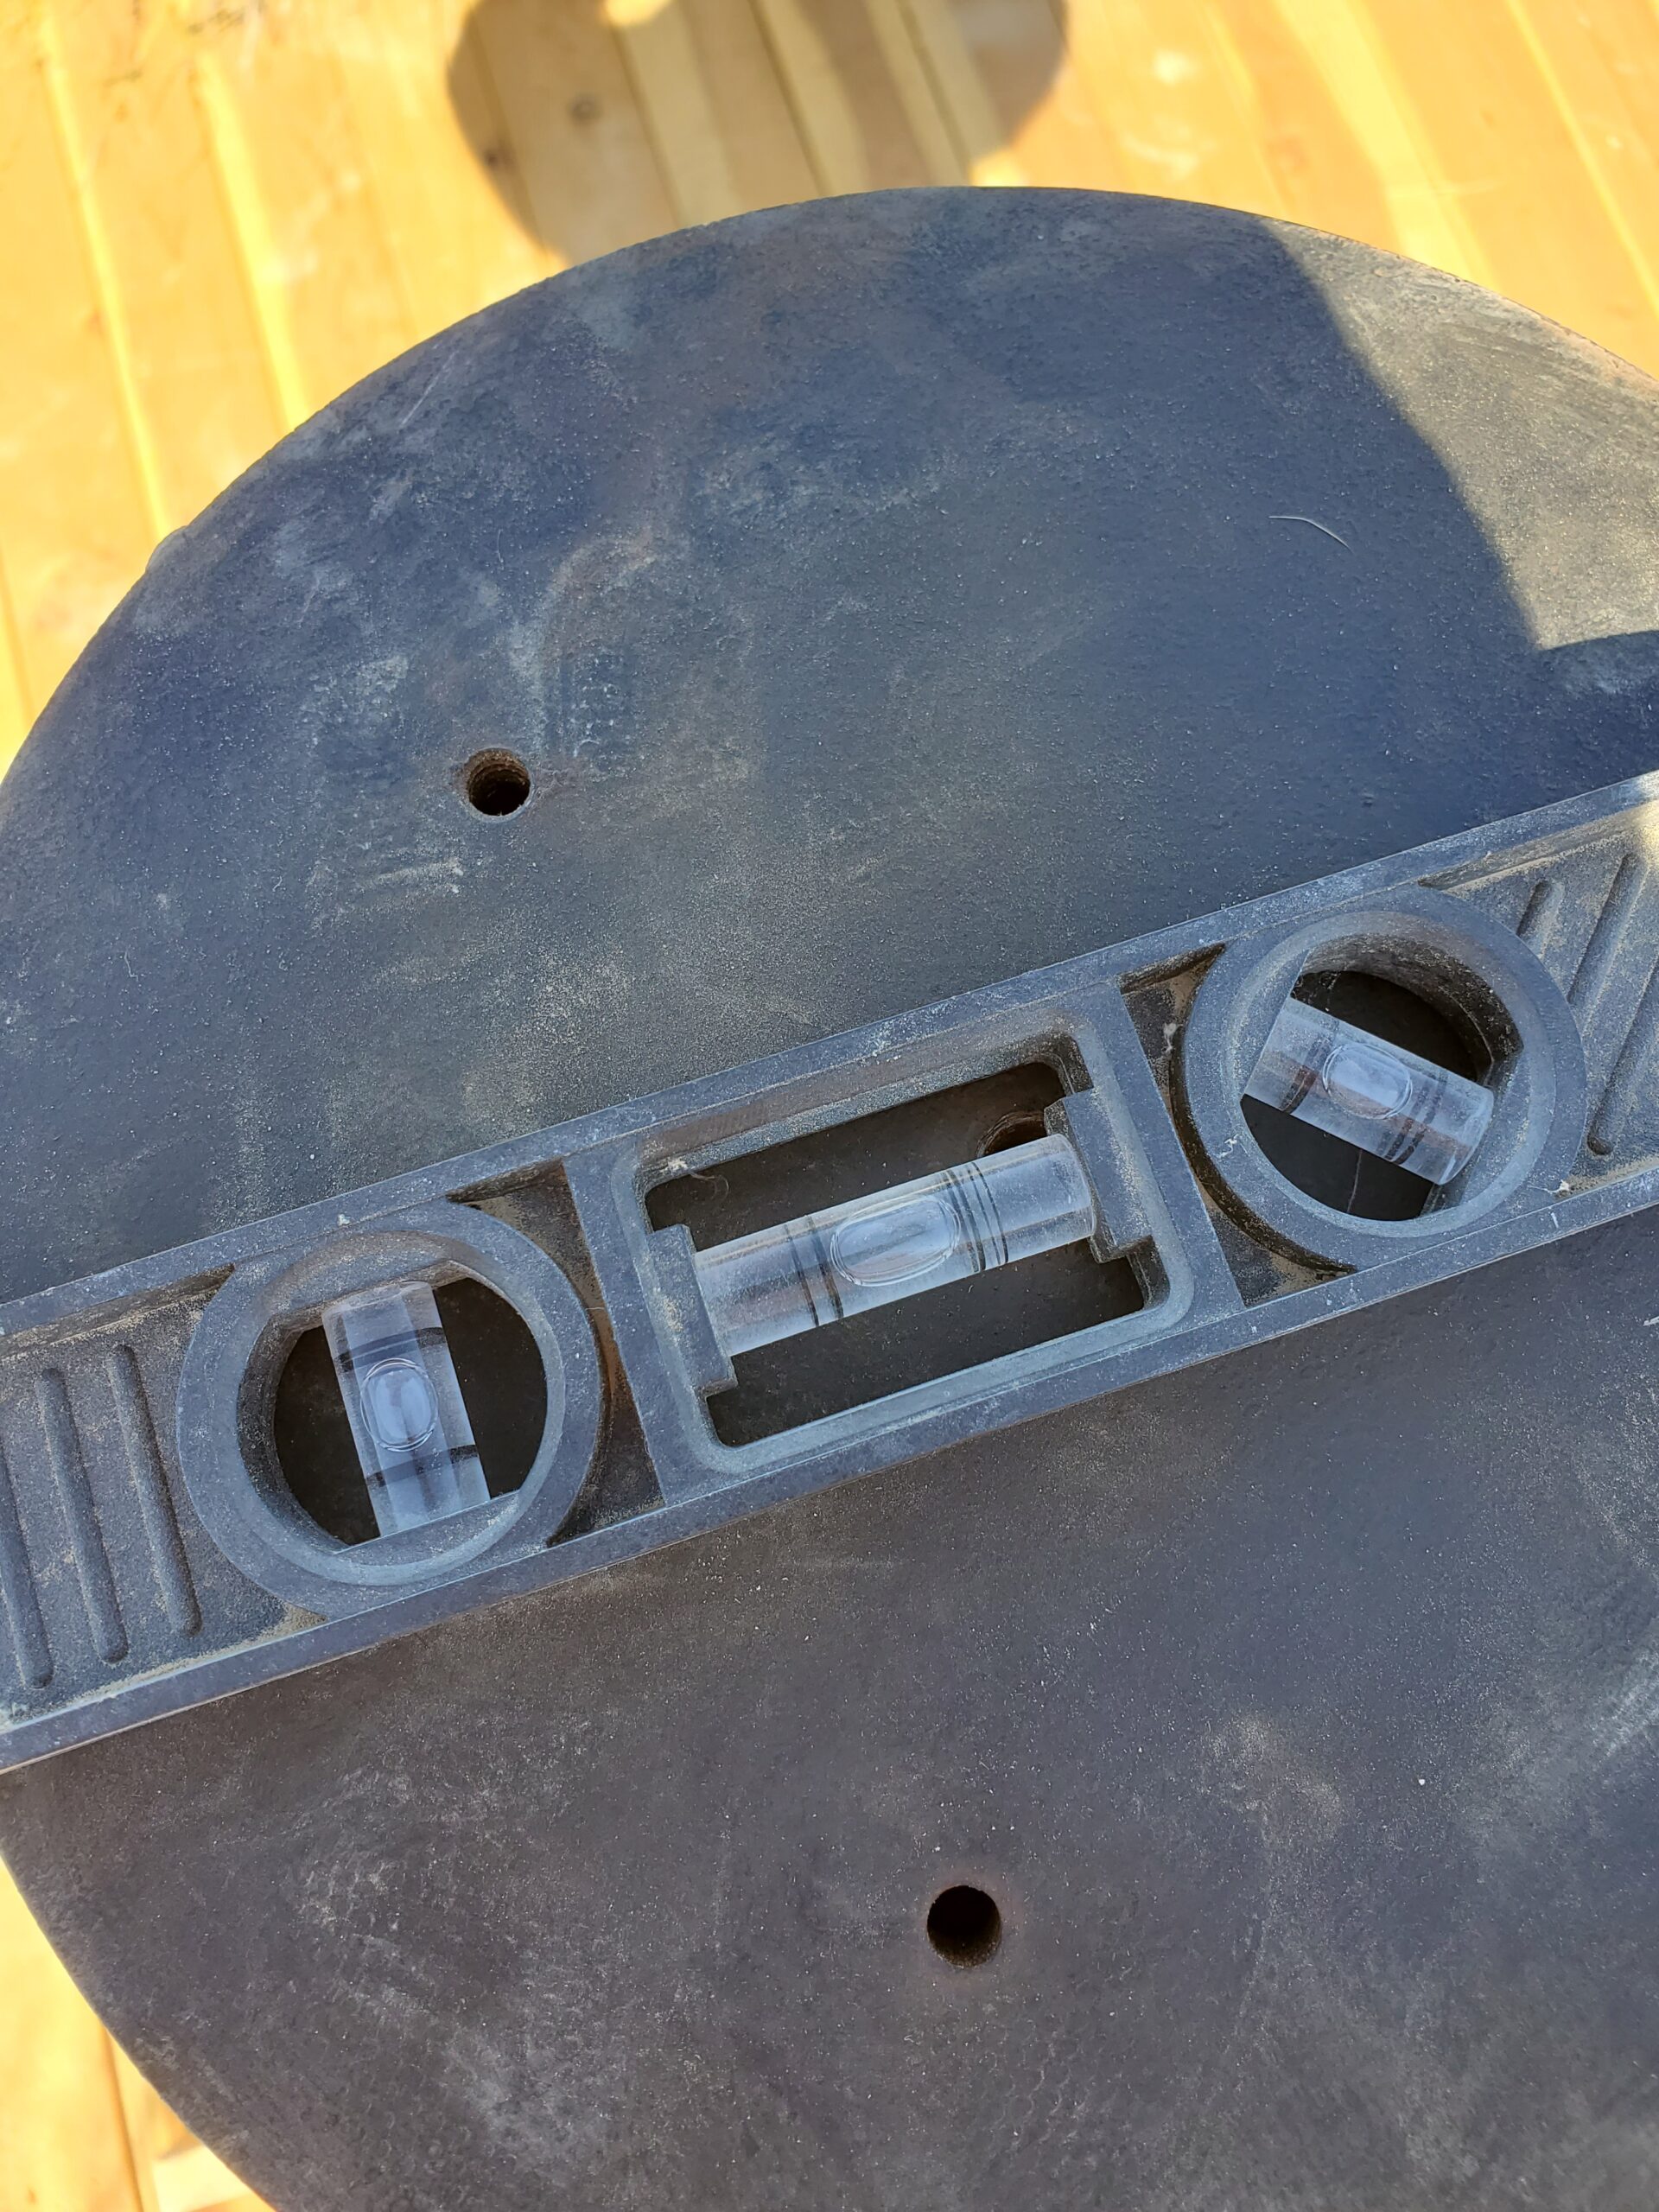
(measure, measure, measure, measure, measure, measure… cut!) How’s that for perfectly level?

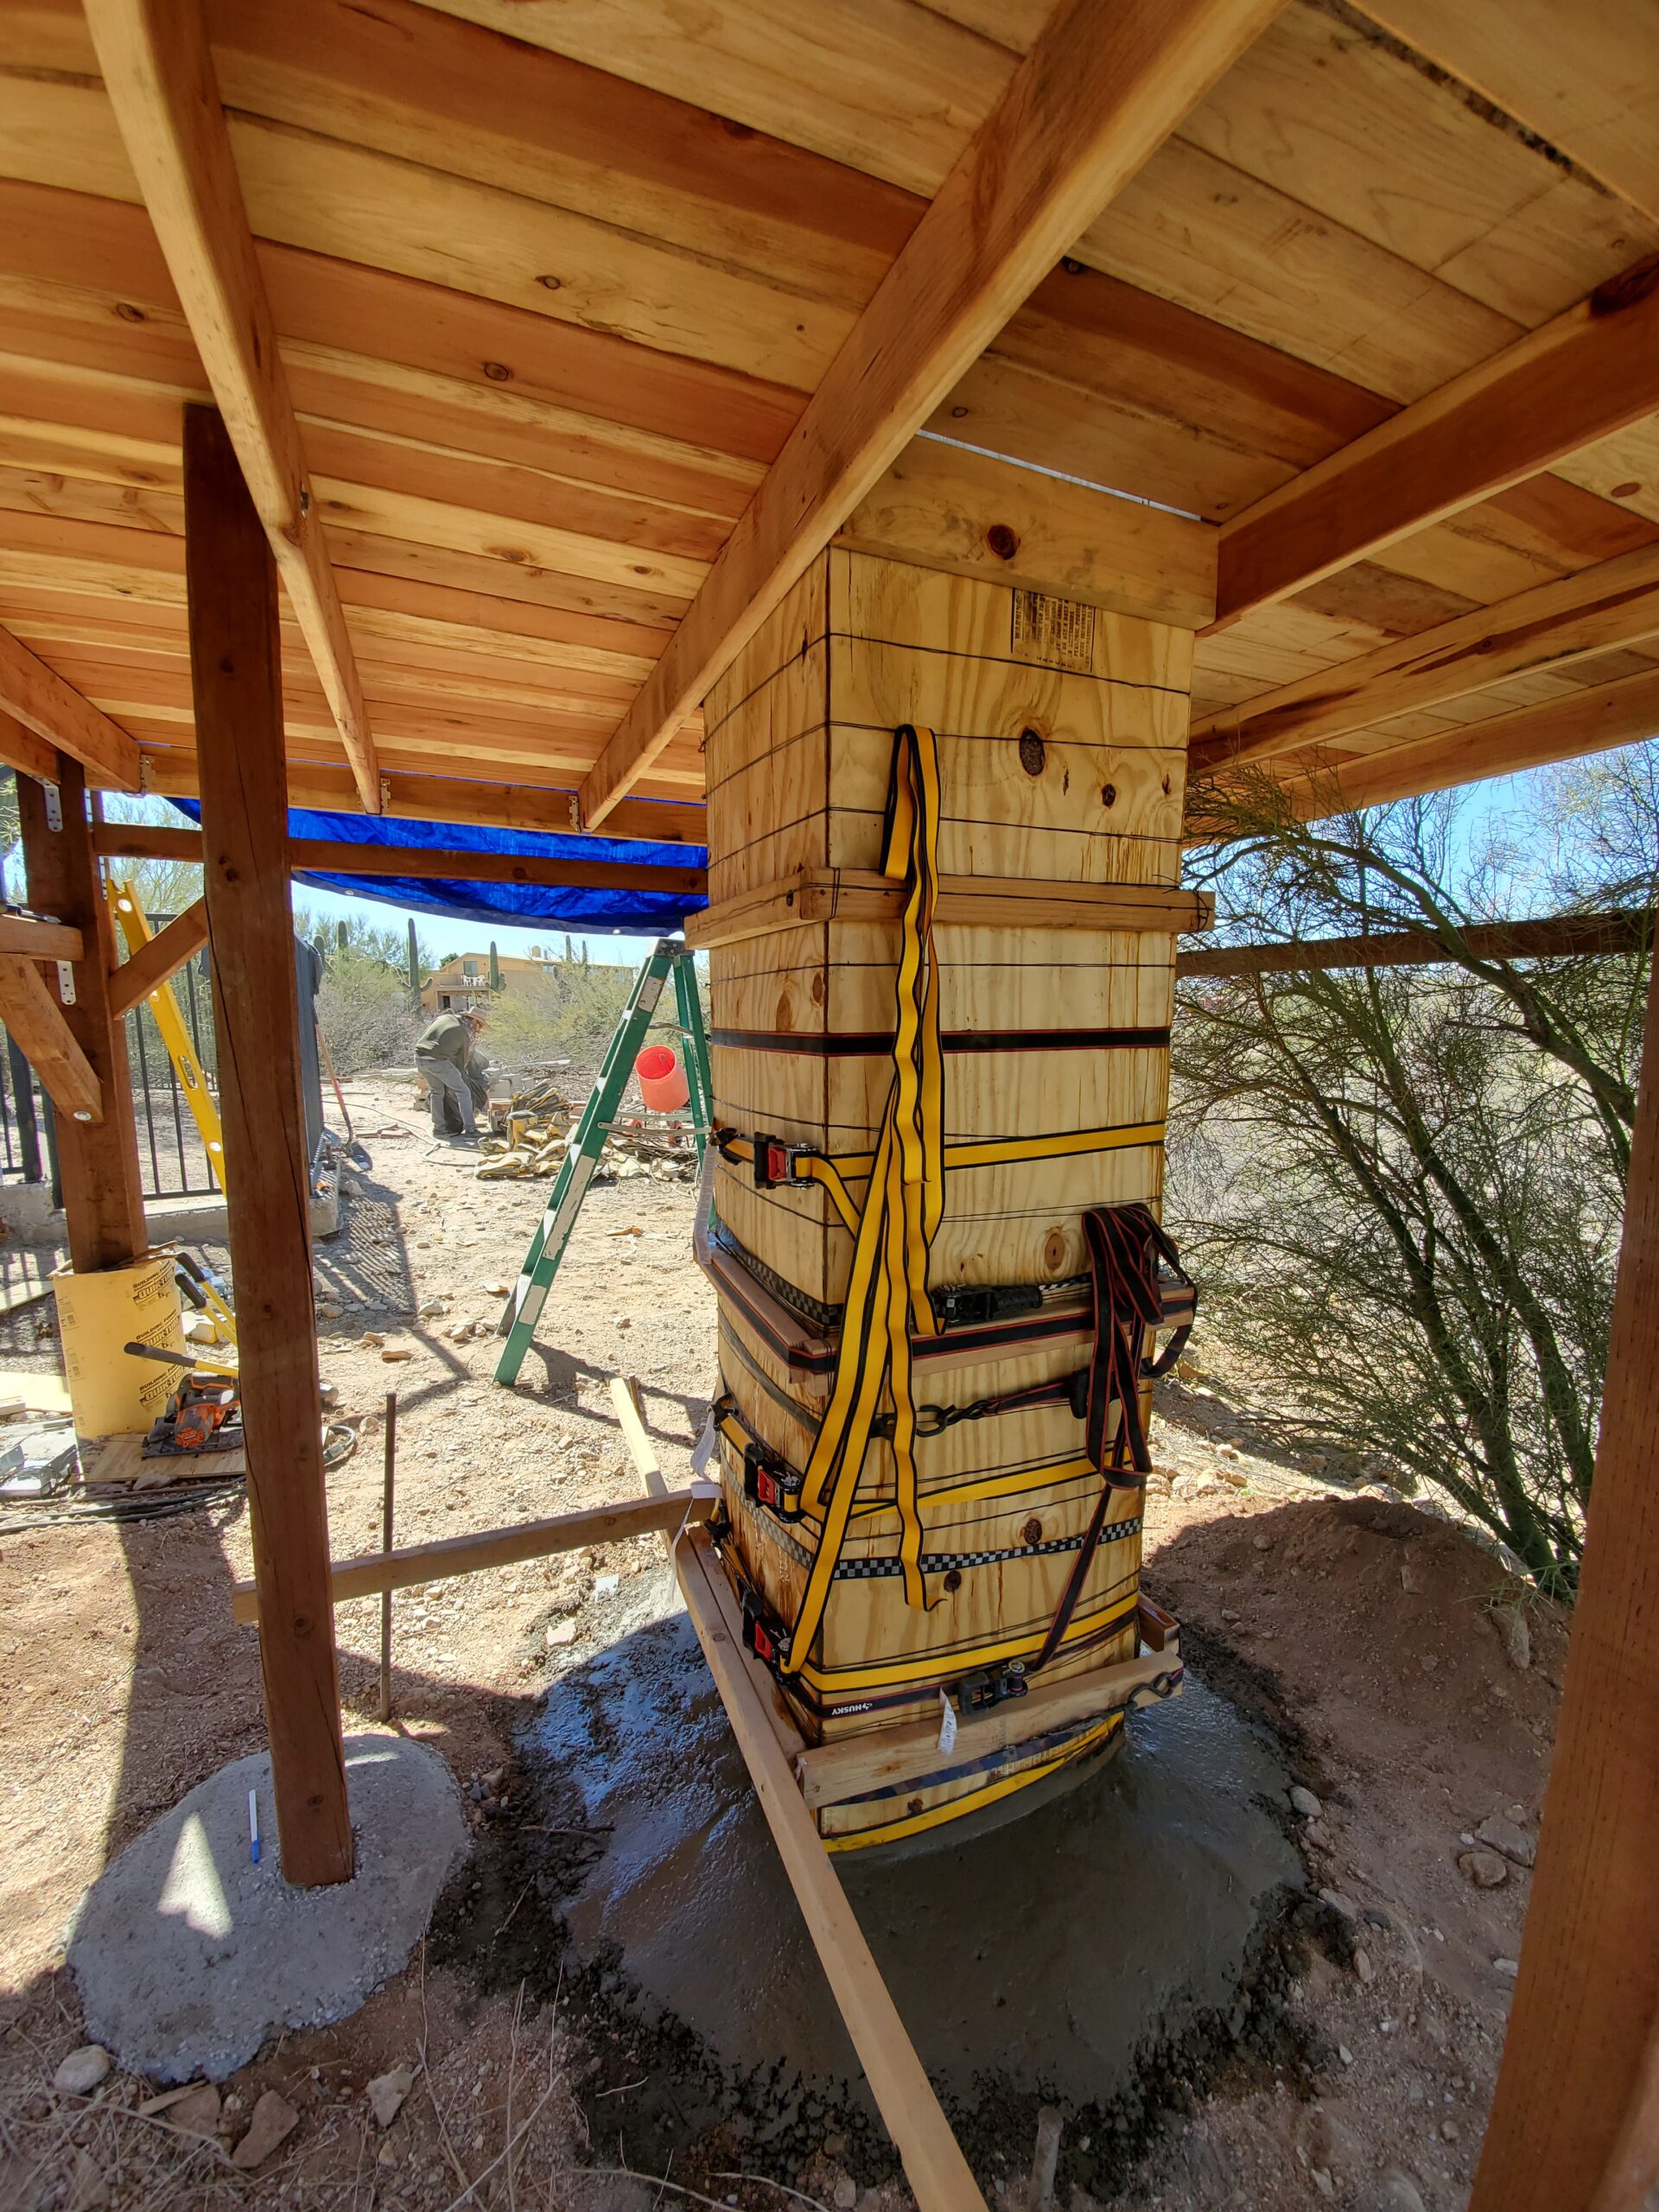
And here is the all important gap! Nowhere is the platform touching the concrete pier. Vibrations, you shall not pass!
So… What’s missing??? THE DOME!!! …. now where does one get a dome during the apocalypse?
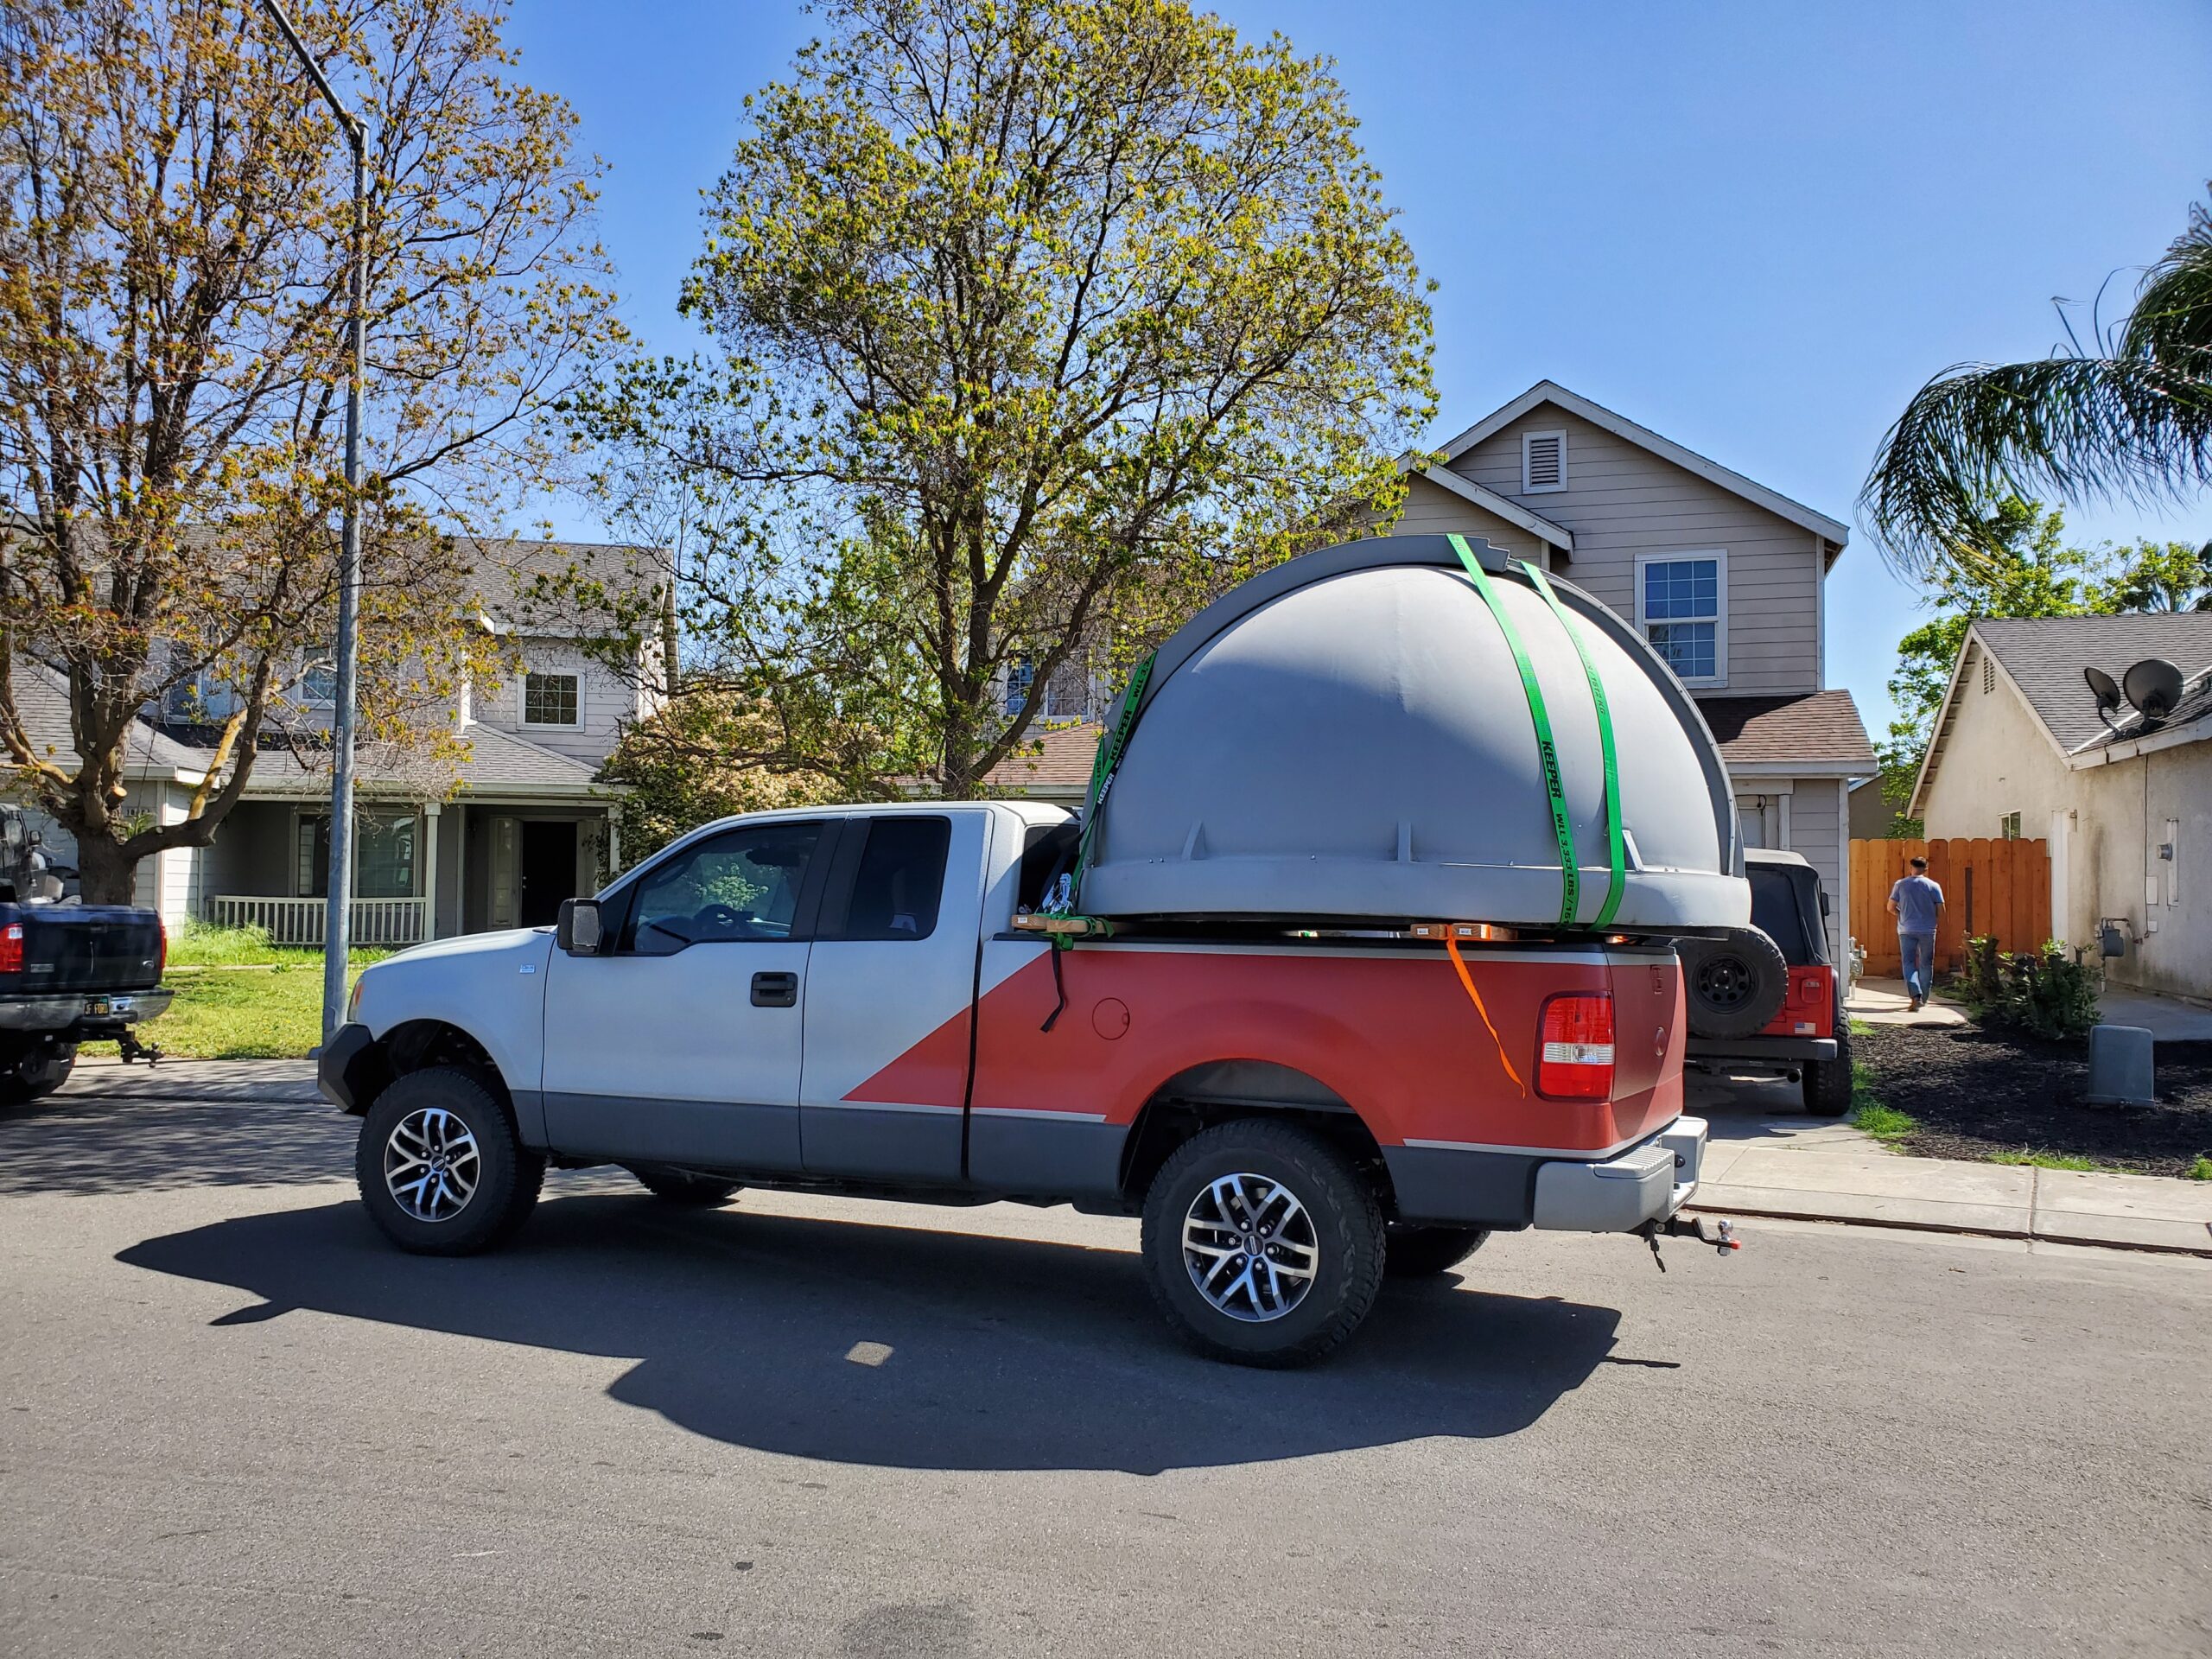
Stockton, California, that’s where! Extra special thanks to Ameer Farah for parting with his Explore-A-Dome and helping me get it on the truck. Yep… I got some funny looks on the way back to Tucson… yep…
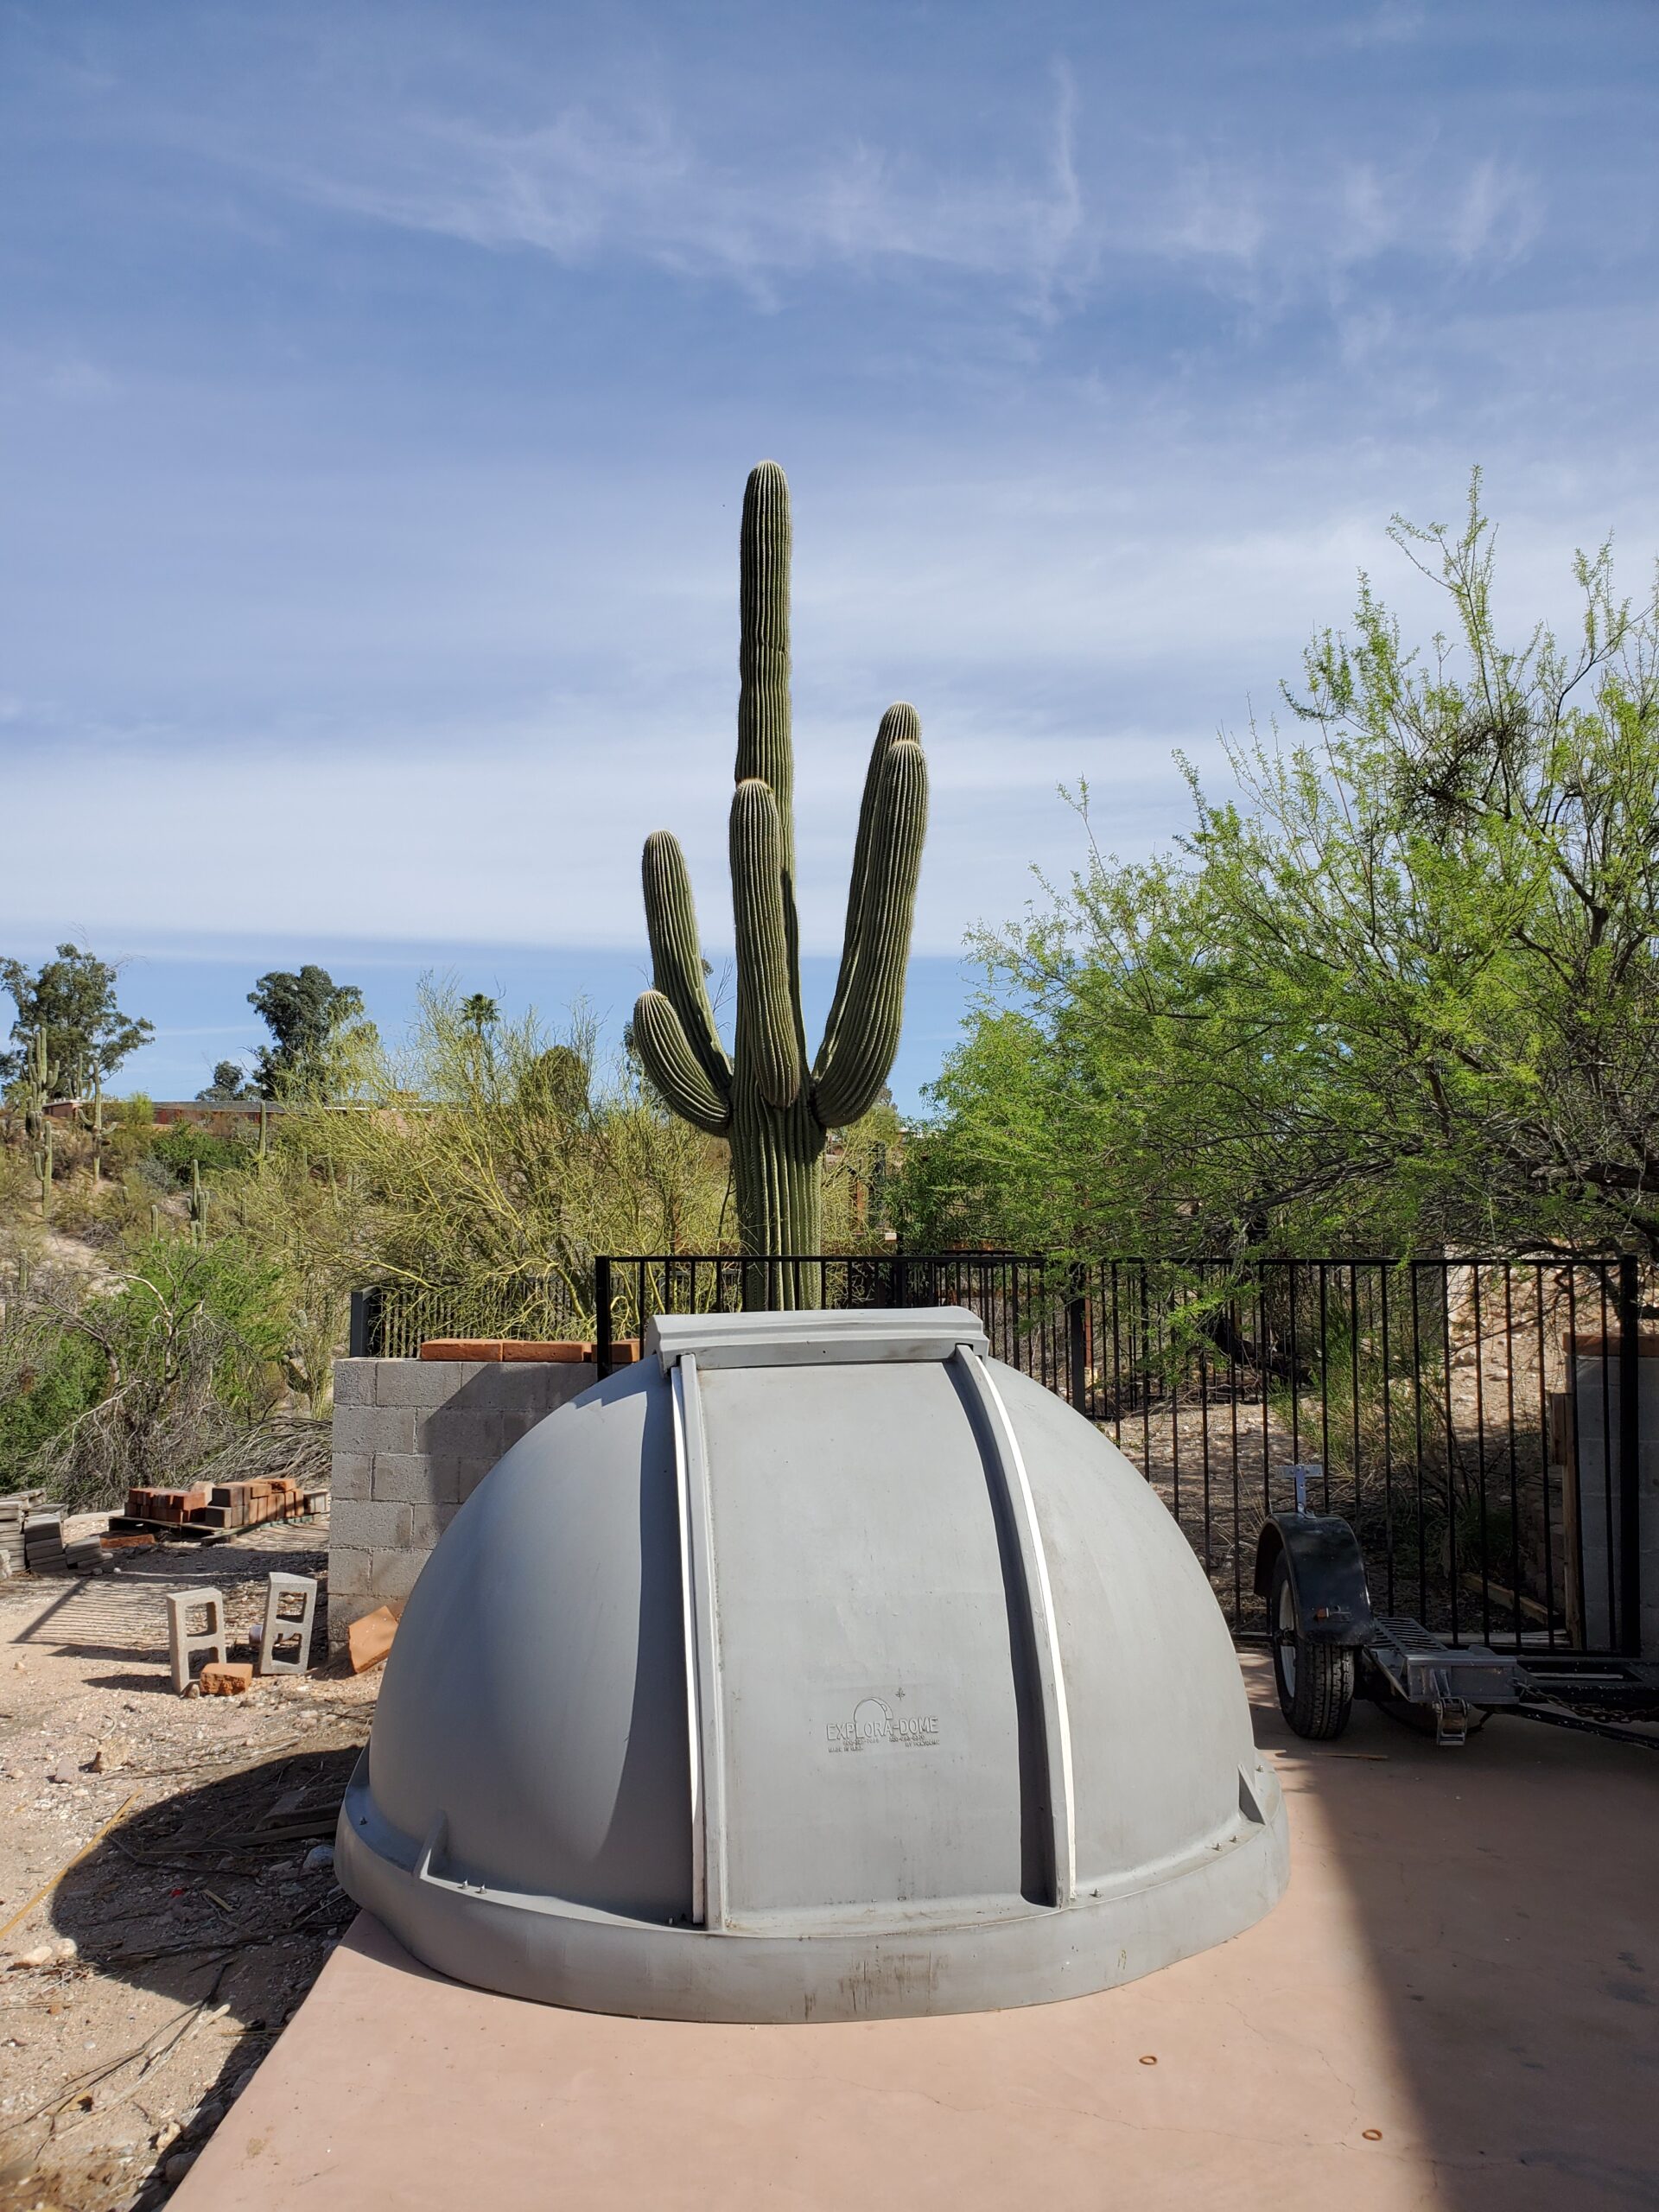
Plop! There’s a dome in the driveway! And now what?
Anyone know how to make an octagonal observatory dome base?
I DO!!!
Presto! Octagonal dome base at your service!

…some siding panels… you know, so it’ll look ok and stuff.
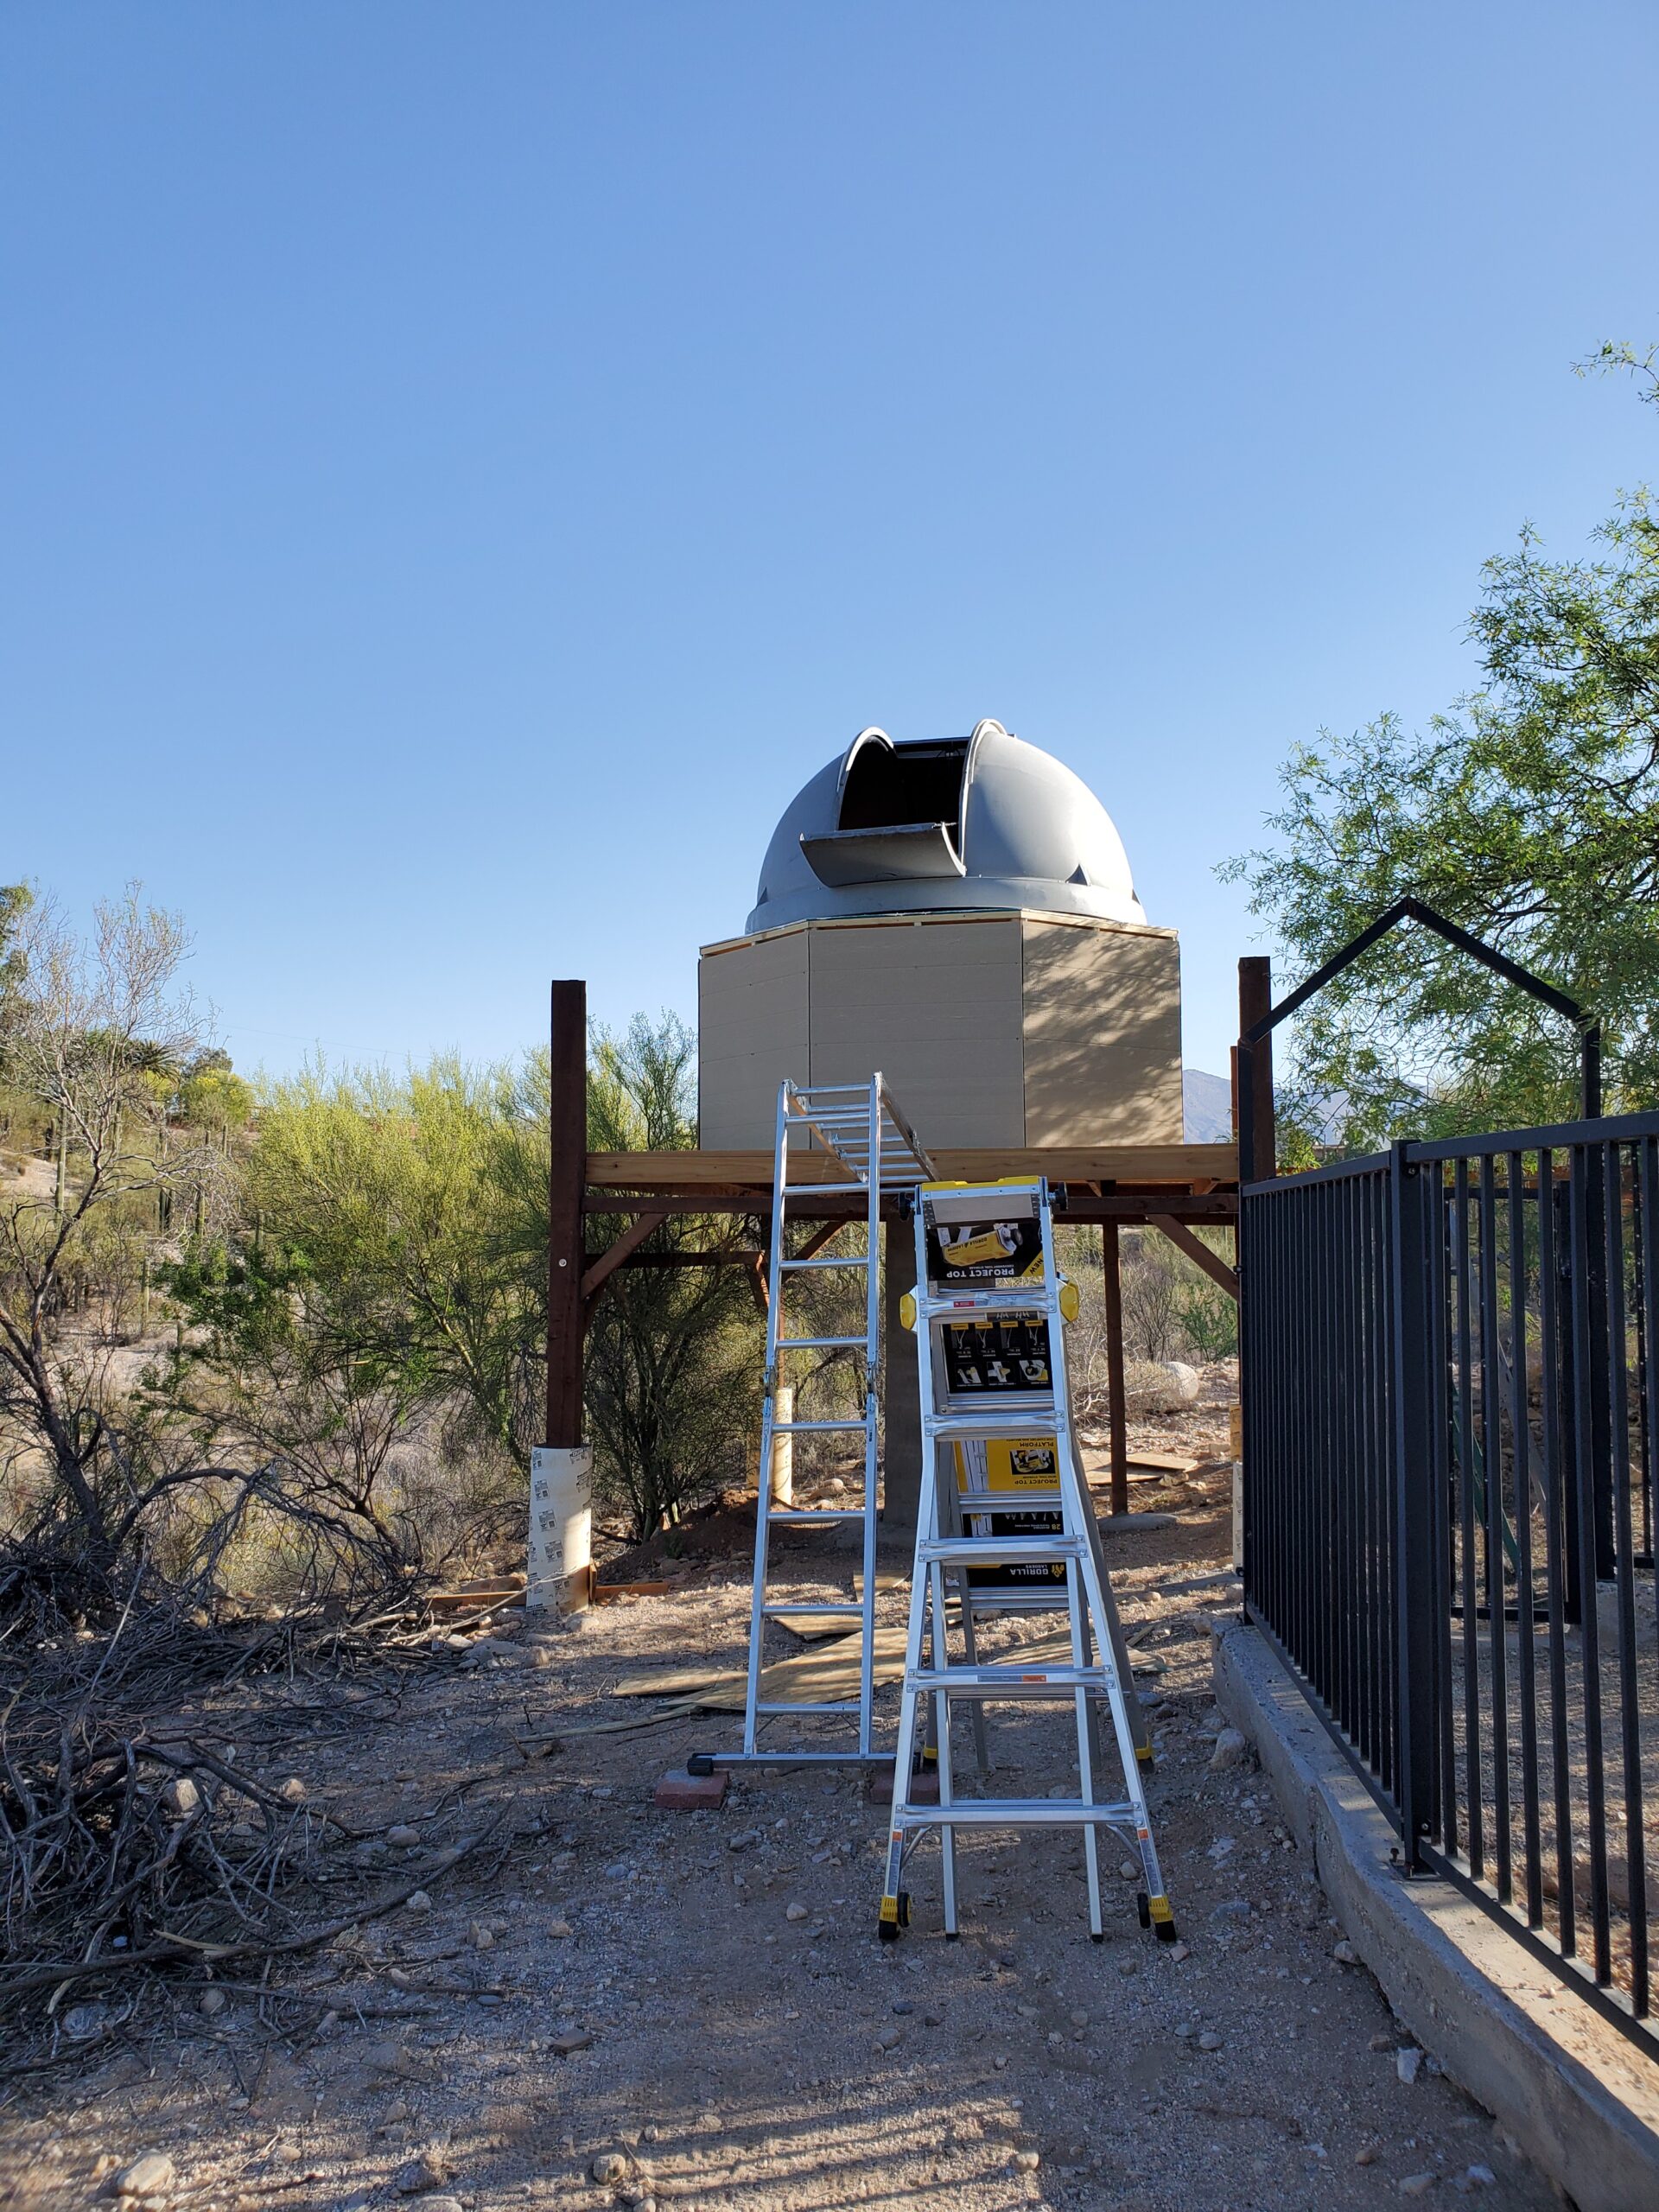
And up goes the dome! That was a trick… I got my best friend, Dave, to help. It was still a trick…
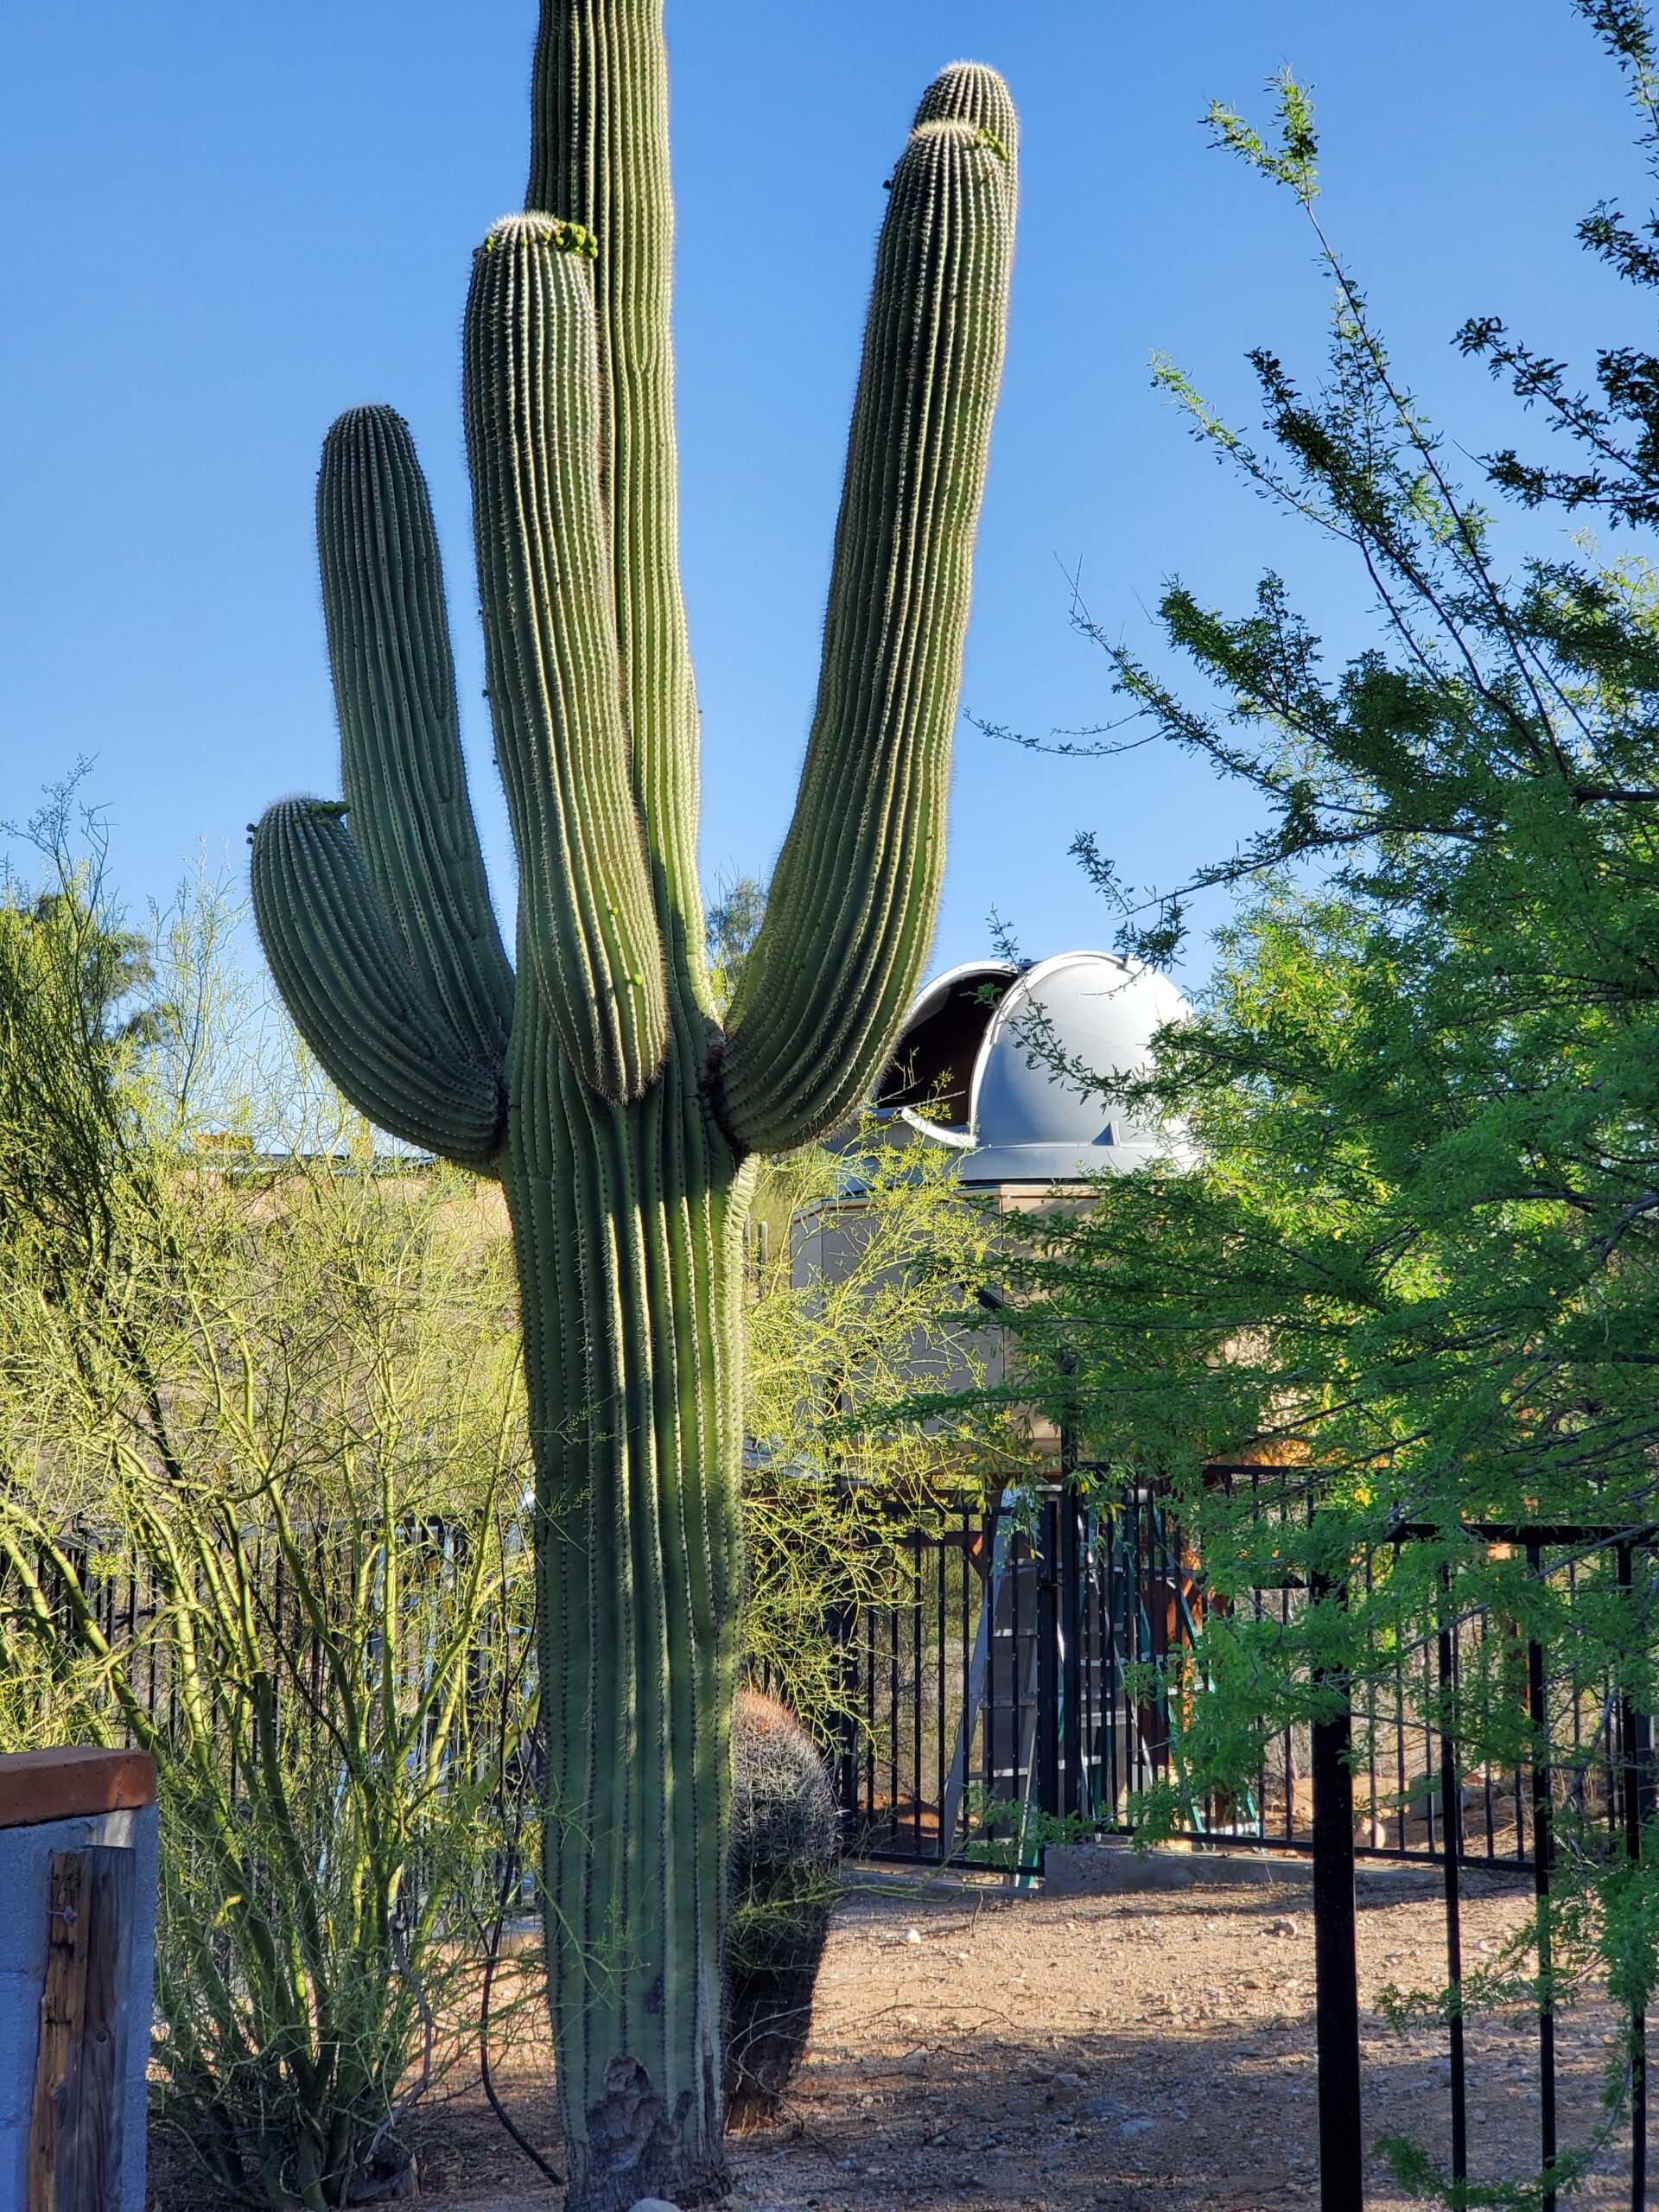
How majestic… In a deserty kind of way…

DONE! …except for deck railings… it usually takes me 10 years or so to get around to installing safety features on things, so no hurry!
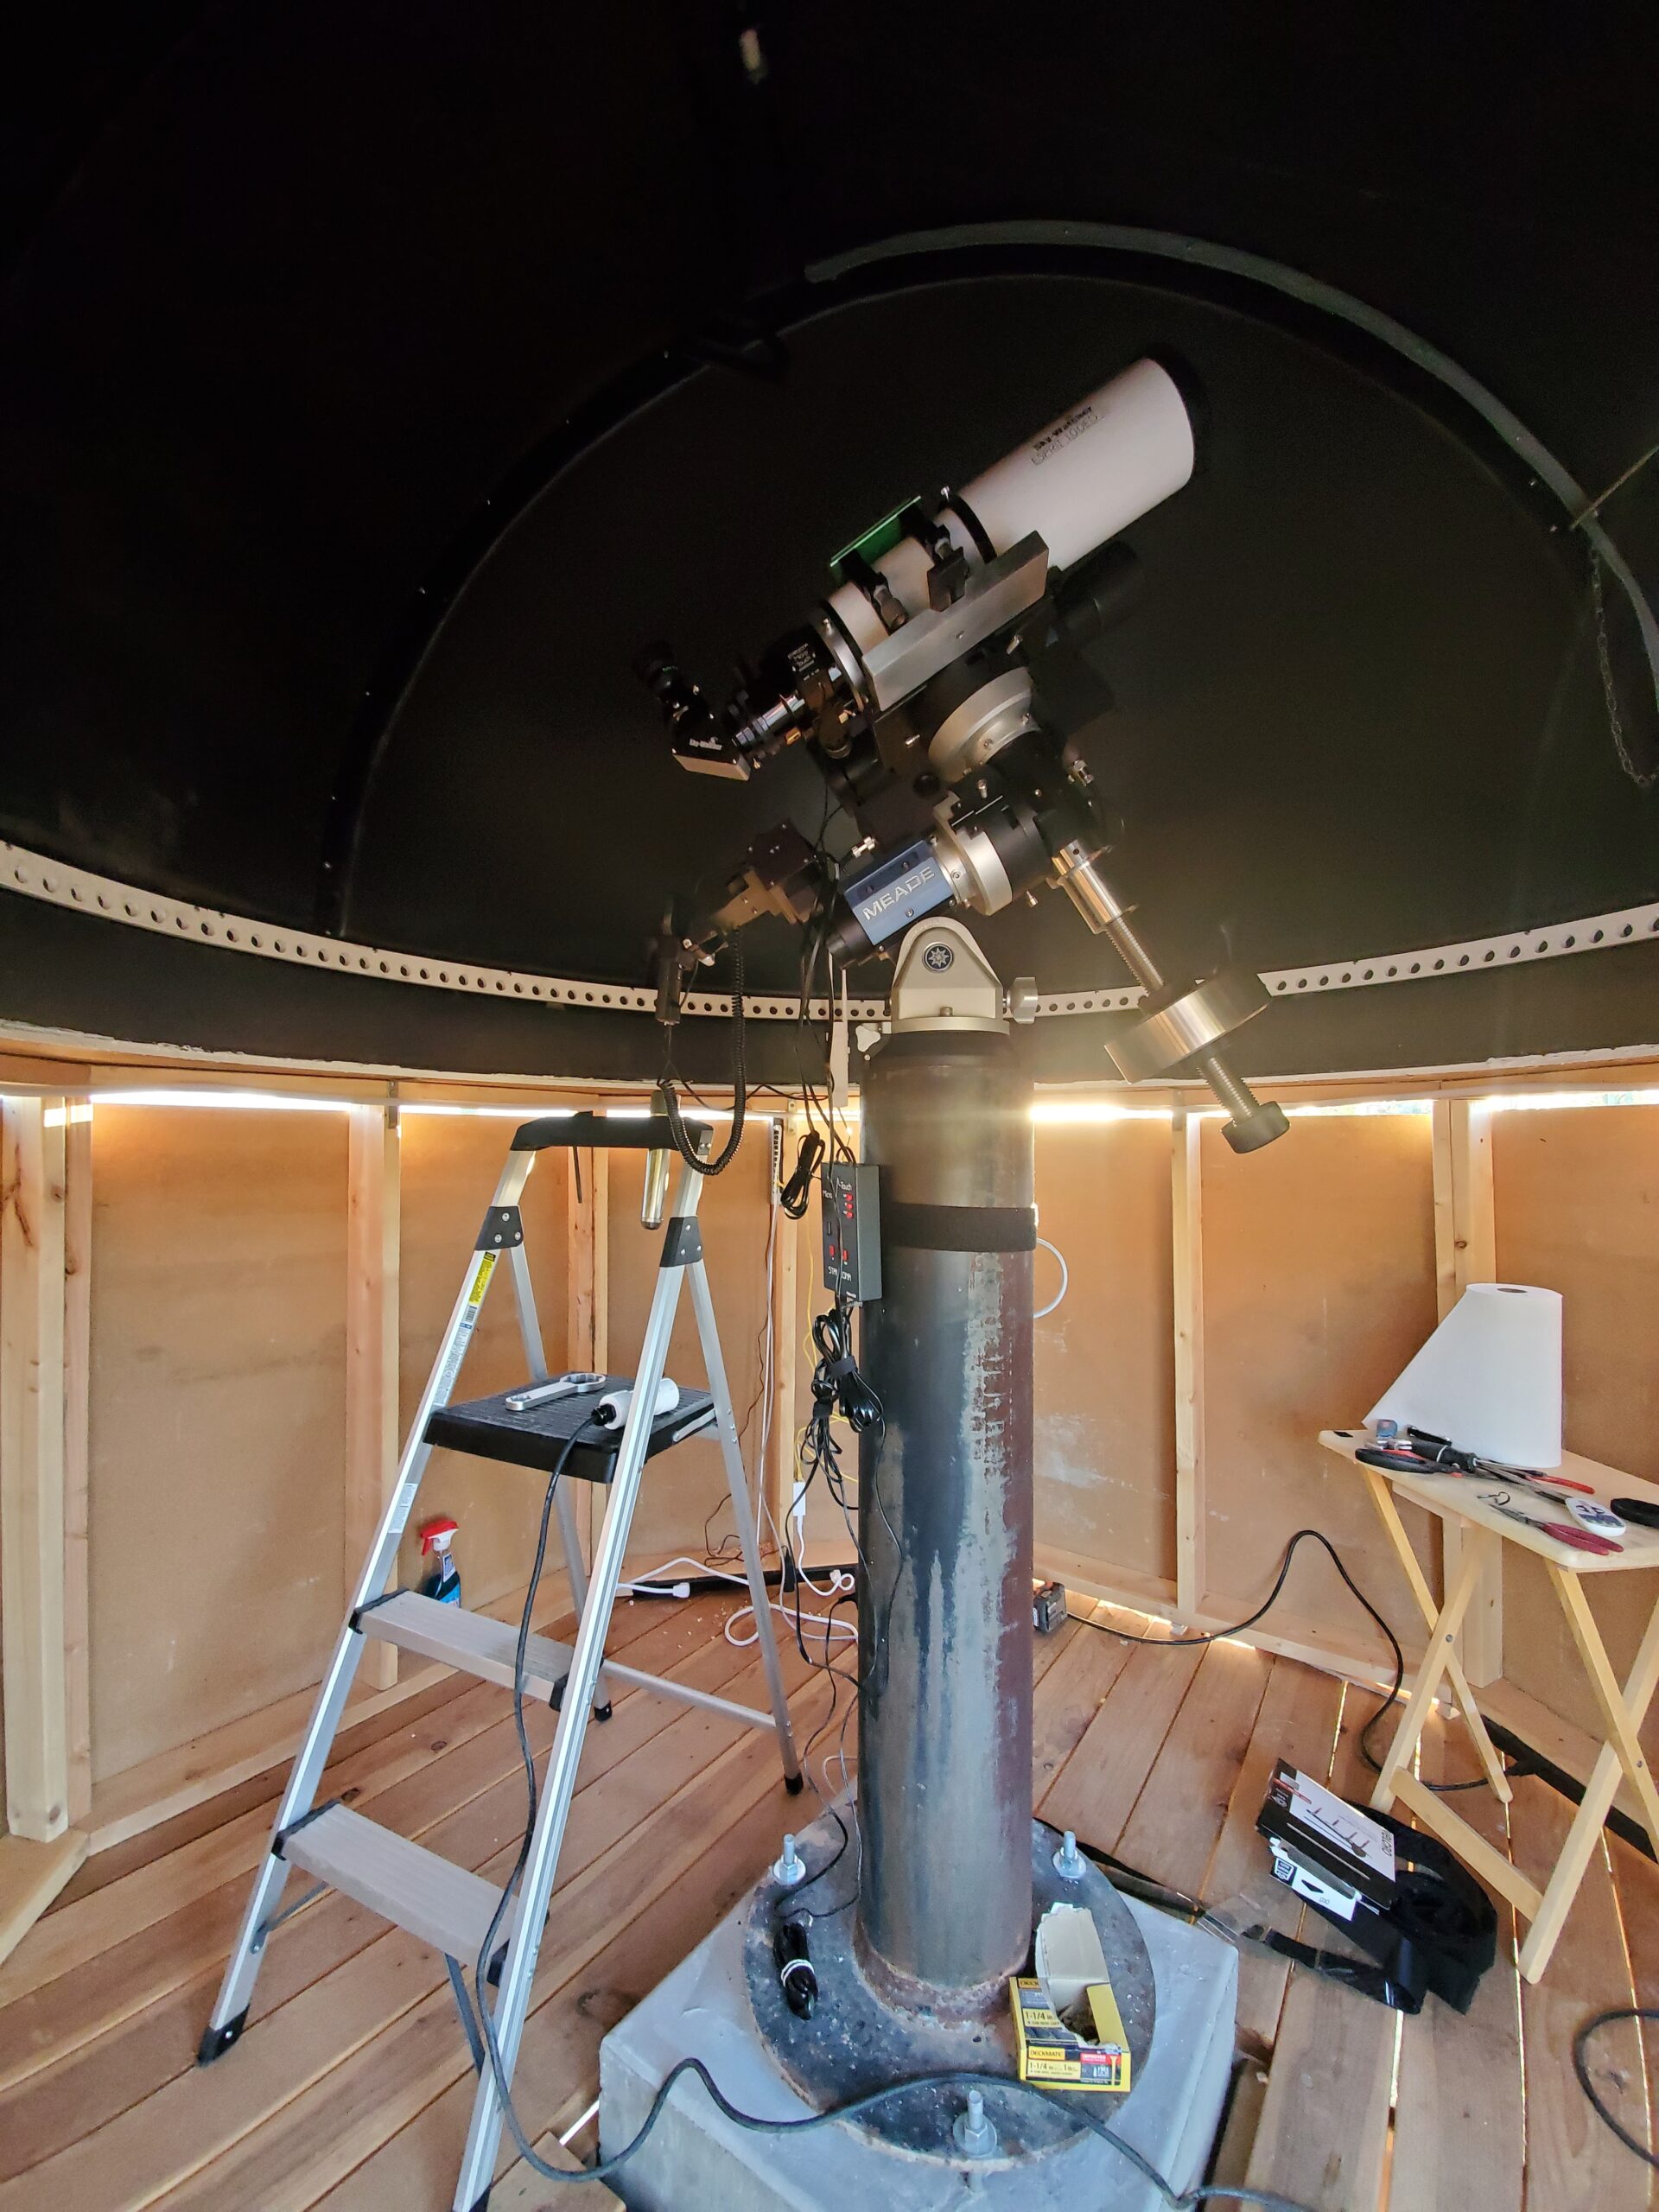
The scope goes in! This is actually my son’s SkyWatcher 100ED. I’m borrowing it while he finishes grad school. Thanks, Sam! 🙂
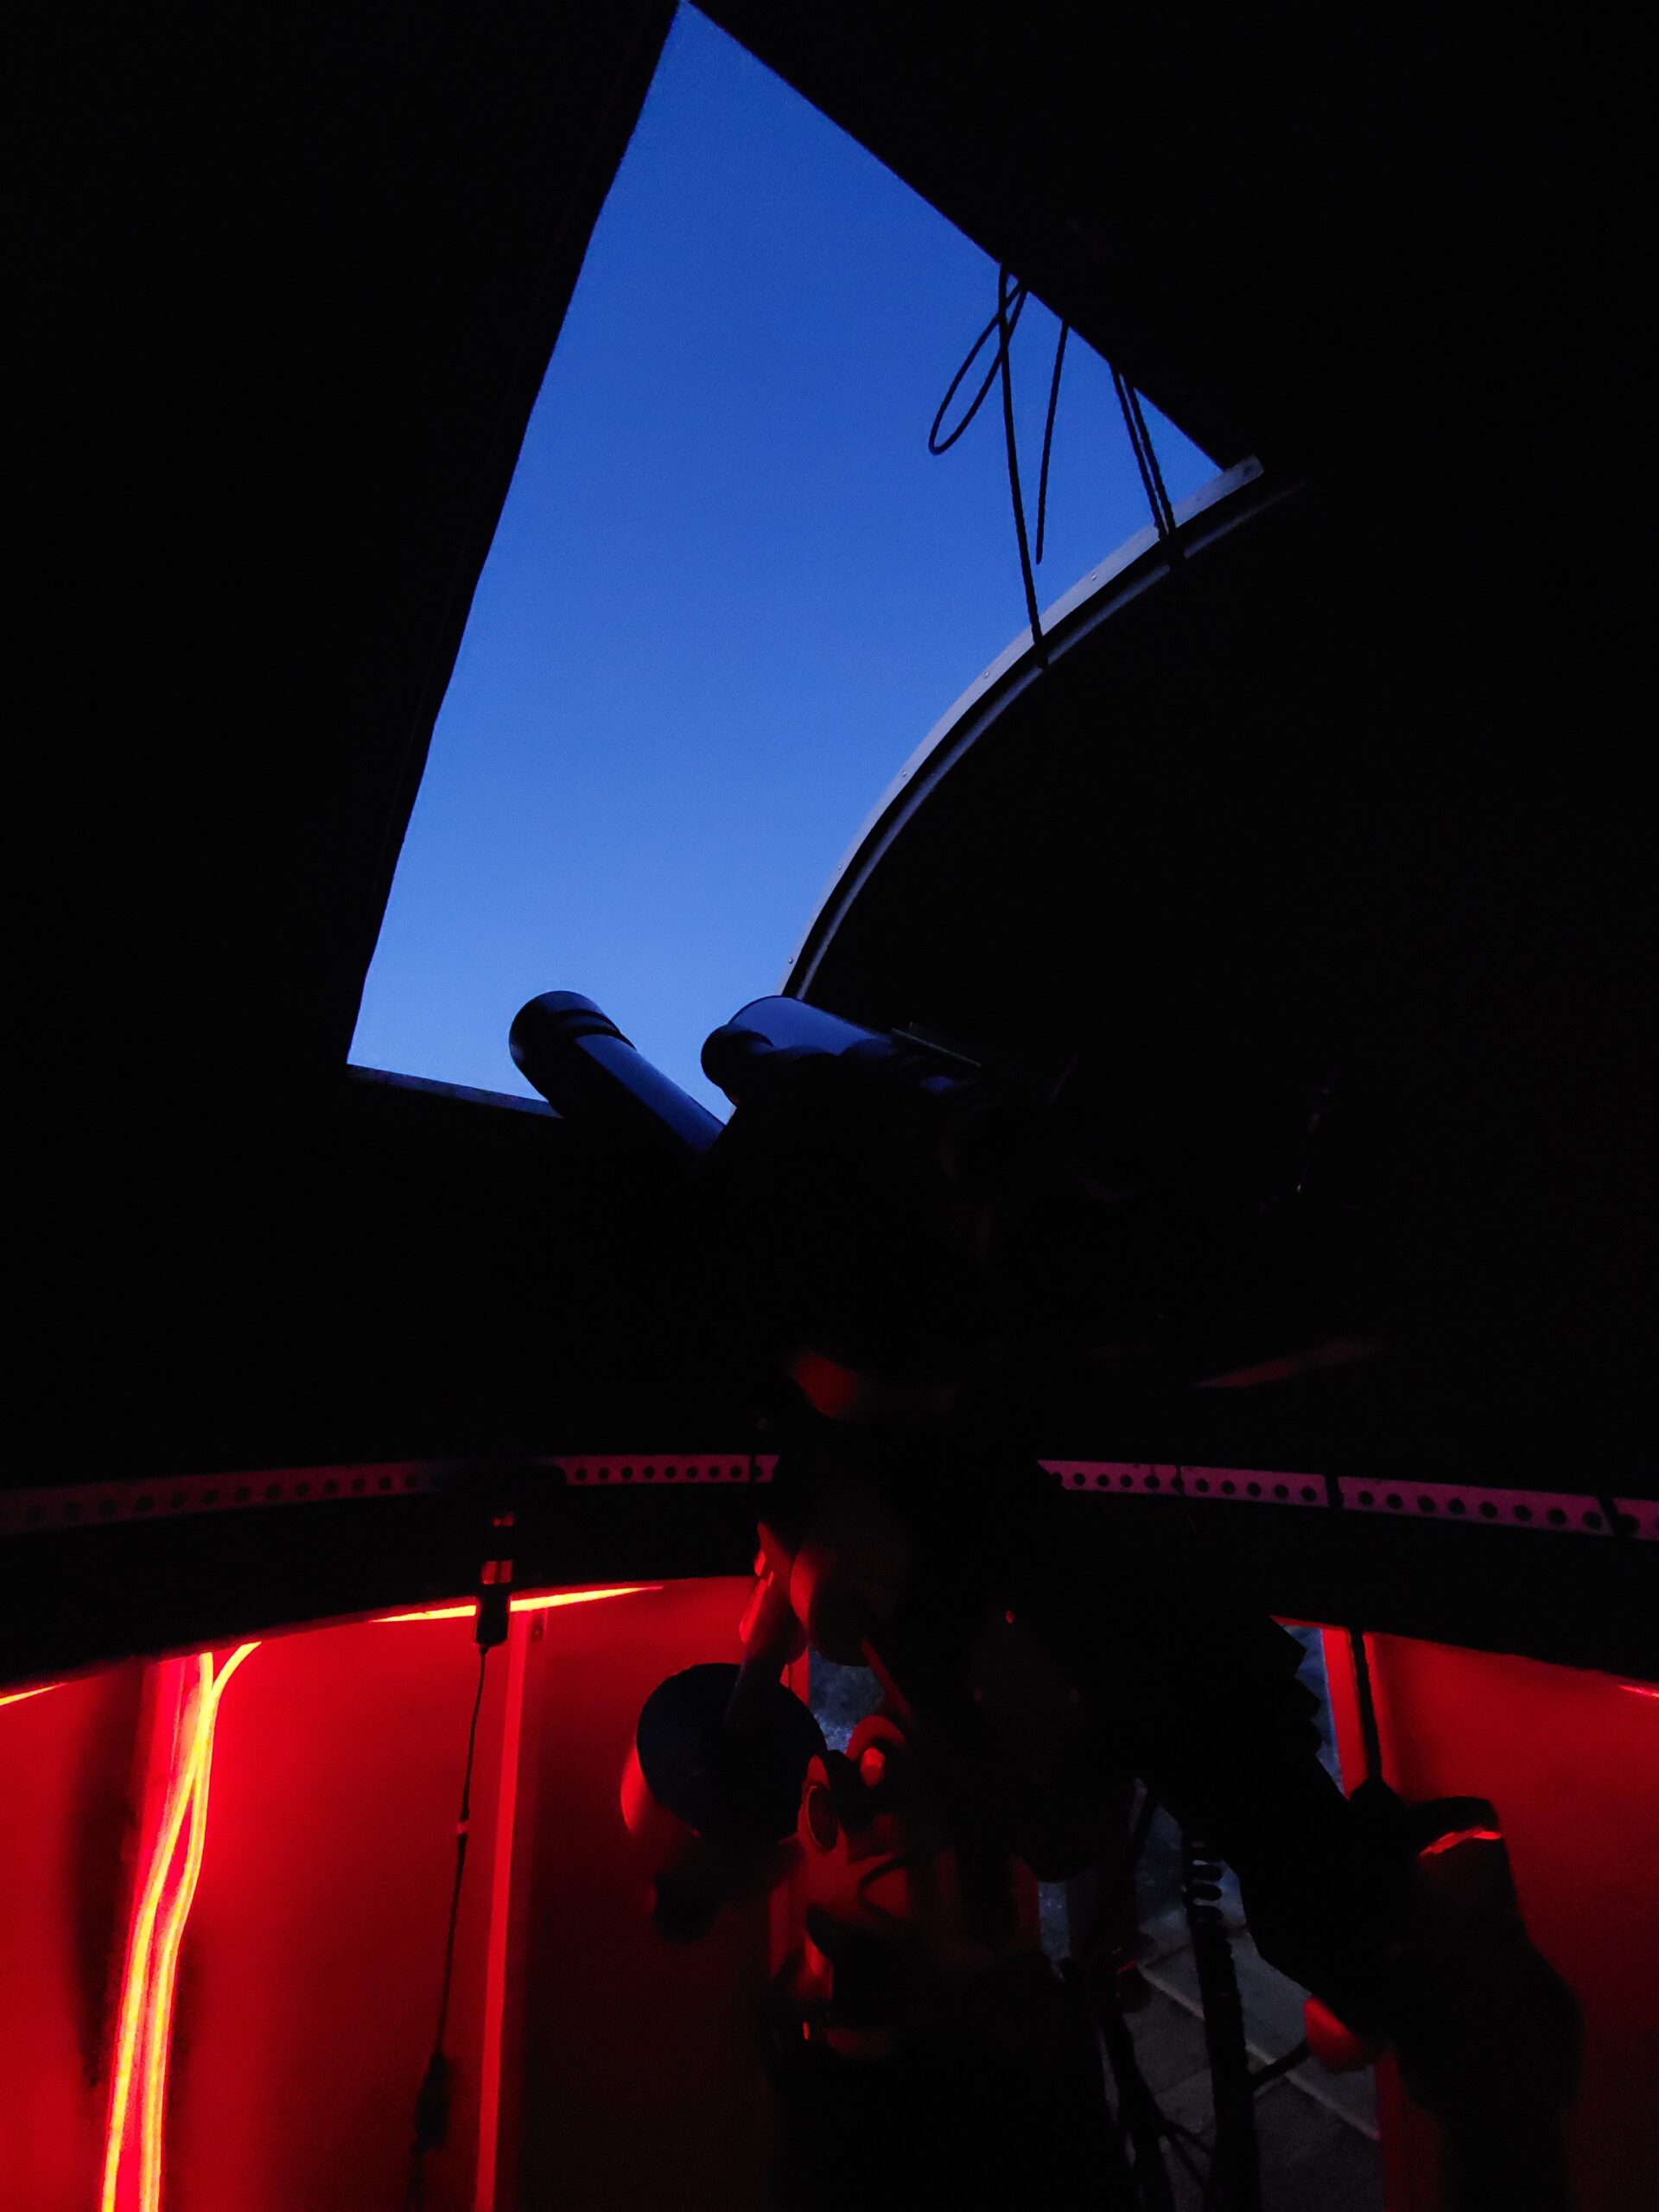
Night falls in the desert…

And there we have it!
M51, The Whirlpool Galaxy.
This is 5 exposures of 10 minutes each at 400 ISO with 30 bias frames and 3 dark frames.
Telescope:                    SkyWatcher 100ED Refractor
Mount:                        Meade LX-850
Camera:                       Canon 5DsR
Camera Control Software:      TheySkyX Pro Imaging Edition
Image Processing Software:    PixInsight
Recent Comments